

It’s been a fun couple of weeks here at Coffeeness, seeing as I’ve had the chance to test out a pair of new Flair manual lever espresso machines. In today’s Flair Go review I’ll tell you all about my experiences using the manufacturer’s most travel-friendly model. So, if you’re currently searching for the best portable espresso maker, you’re going to want to read on.
Incidentally, I should tell you that Flair was kind enough to send me the Go Portable Lever Espresso Machine to test out. However, don’t imagine for a second that this is some kind of product placement review. As always, I’ll be completely honest about what I liked and didn’t like about the Flair Go.
With that out of the way, let’s get right into this Flair Go review!
Compact and travel-friendly
Flair Go Portable Manual Espresso Machine
A very capable portable manual lever machine
Foldable frame
Easy to set up
Makes superb espresso
Pressure gauge included
Somewhat of a steep learning curve
| Flair Go Portable Manual Espresso Machine | |
| Manufacturer | Flair Espresso |
|---|---|
| Model number | GO “Grounds” |
| Product category | Manual espresso machine |
| Housing material | Stainless steel |
| Color options | Black, Forest Green |
| Milk frother | None |
| User interface | None |
| App | |
| User profiles | Memo function only |
| Portafilter size | 41 mm |
| Tamping | Manual |
| Removable water reservoir | |
| Water reservoir capacity | N/A |
| Number of boilers | 1 |
| Pump pressure | 9 bar |
| Maximum cup height | 5.0 in / 12.7 cm |
| Grinder | N/A |
| Grind adjustment levels | N/A |
| Bean hopper capacity | N/A |
| Specialty drinks | 1 |
| Pre-infusion | |
| Adjustable coffee temperature | |
| Adjustable milk foam temperature | |
| 2-cup function | No |
| Hot water function | |
| Hot milk function | |
| Milk foam only option | |
| Water filter | |
| Power consumption | |
| Weight | 4.0 lb / 1.8 kg |
| Dimensions | 10.5 x 5.0 x 12.0 in |
| Warranty | 5 years |
| Notes | Included Accessories: User manual, dosing funnel, puck screen, pressure gauge, metal tamper |
| Current price on Amazon | $149.00 |
| All specifications | |
Table of Contents
Flair Go Review Overview
If you’ve checked out my recent Flair Pro 3 review, you’ll know how impressed I was by the company’s latest offering. The Pro 3 takes everything I loved about the original Flair Classic, but adds thoughtful and functional improvements. And during my testing, I found it much easier to quickly get superb espresso shots from the Pro 3.
As it happens, the new Flair Go Portable Manual Espresso Machine takes things in a different direction. Not to say that the thing is more complicated, it’s just smaller, quicker to set up and less expensive. In fact, you’ll only have to shell out $149.00 for this particular model.
I’ll discuss my experiences using the machine later in this Flair Go review. Still, you’ve probably guessed that it isn’t quite as premium as the manufacturer’s other models. With that said, it is made using high-quality materials, and it is capable of producing very good shots of espresso.
As with any manual lever espresso machine, you’re going to need an espresso-worthy grinder to get good results from the Flair Go. However, there are some very affordable models in my guide to the best manual coffee grinders. Moreover, you can expect a rather steep learning curve with this thing. Still, I can tell you that getting to grips with the Flair Go isn’t rocket science, and once you’ve got the hang of using it, you’ll find that it’s actually very easy to use.
By the way, for my Flair Go review I tested the model that uses freshly ground coffee. However, the company also offers the . Then again, I’d recommend avoiding that option altogether.
Flair Go Manual Espresso Machine Features
Now that we have a clearer idea of what we’re dealing with, let’s continue this Flair Go review by zeroing in on the machine’s standout features.
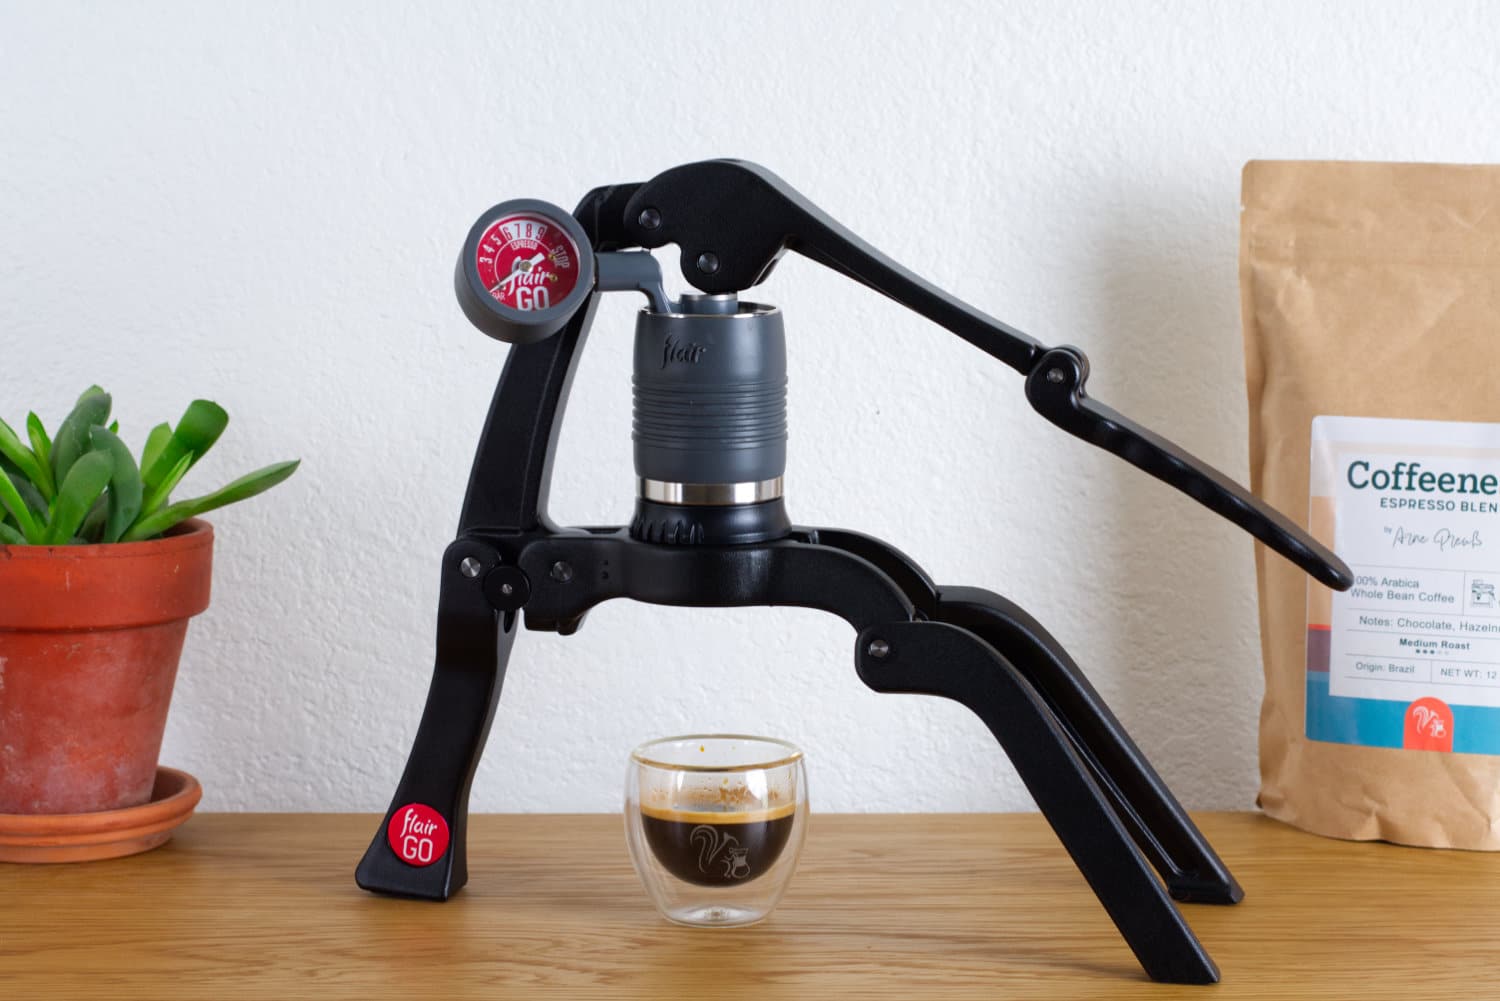
Build Quality and Design
Unlike the other two Flair machines I’ve tested, the Flair Go features a unique collapsible frame rather than a separate base and lever assembly. I have to say the manufacturer has hit a real home run with the Flair Go’s design, even if the way it’s described in the promo materials is a little cringe-worthy:
Six Pivot Points for Easy Setup: Inspired by the flexibility of yoga, the Flair GO features six pivot points that allow it to unfold from a compact form into a fully functional lever espresso machine in seconds.
Anyway, setting up the frame really is as easy as advertised. And while I was initially a little worried that the thing would feel too flimsy, it’s actually quite stable. Sure, you have to be a little careful when you’re pressing the lever, but I didn’t experience any issues.
Made from high-quality aluminum and steel, the Flair Go frame weighs just 3 pounds (1.4 kilograms). Plus, seeing as it folds up into a small package, it truly is a very portable espresso machine.
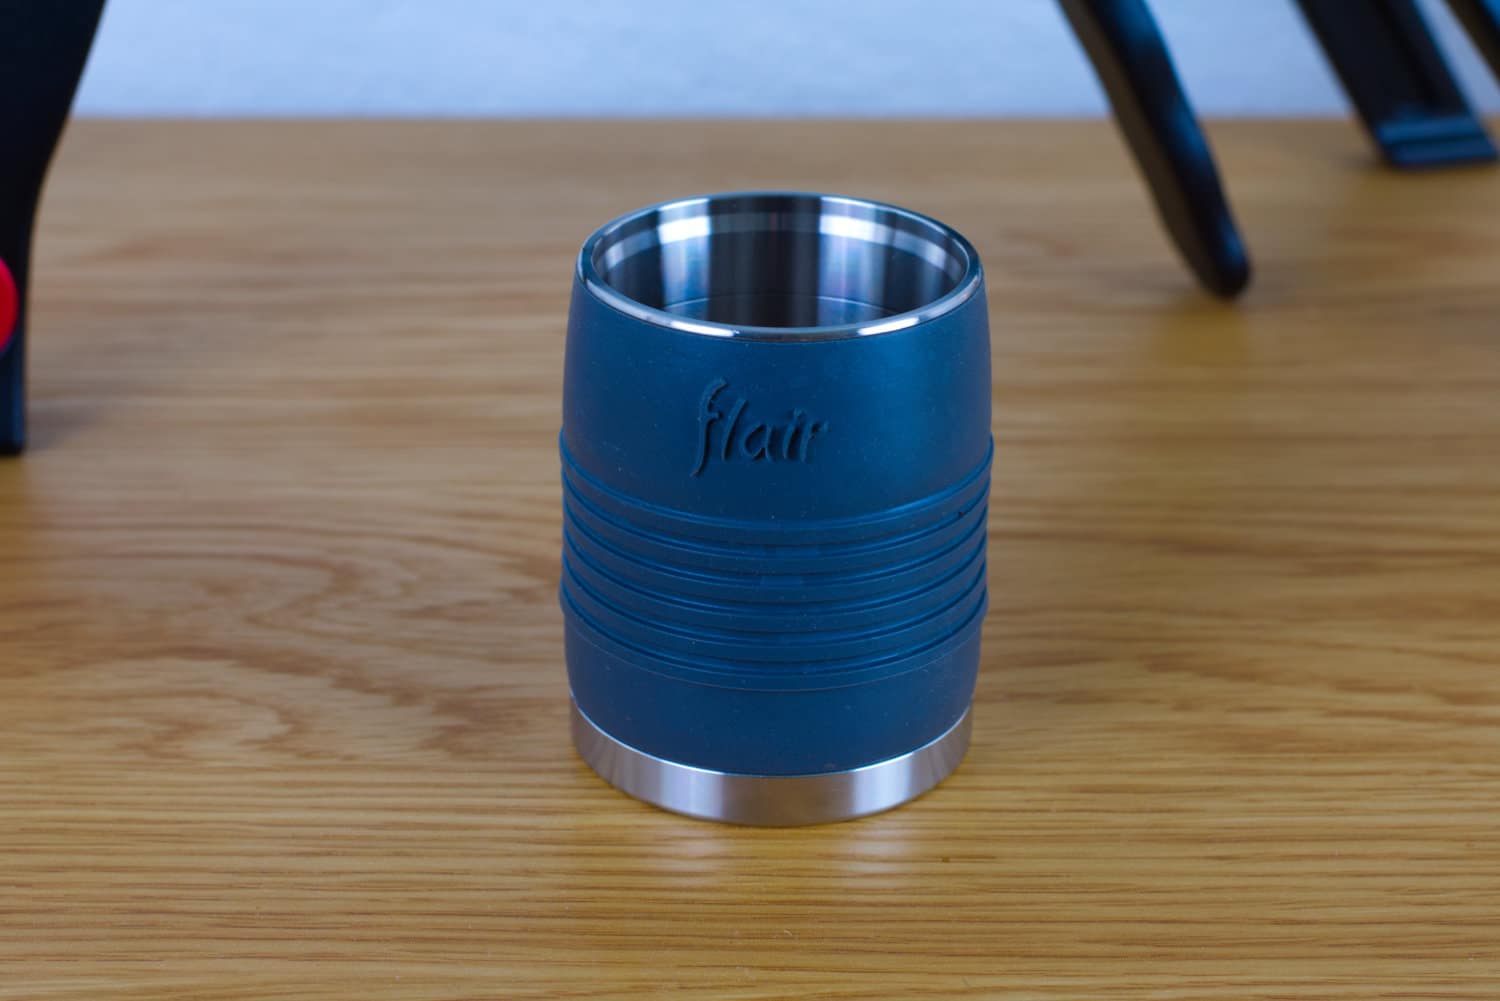
Brewing Cylinder
The Flair Go’s brewing cylinder has a 2-ounce (60 milliliter) capacity, with a maximum yield of around 1.5 ounces (45 milliliters). So, you can only really expect to pull ristretto shots of espresso.
As with the Pro 3, the cylinder has been constructed using thinner walls, with the manufacturer claiming it doesn’t require preheating. The brewing cylinder feels burly and well-made, and comes with a nice silicone collar. However, in my experience, pulling shots without preheating the thing resulted in sour espresso that simply wasn’t hot enough.
2-in-1 Portafilter
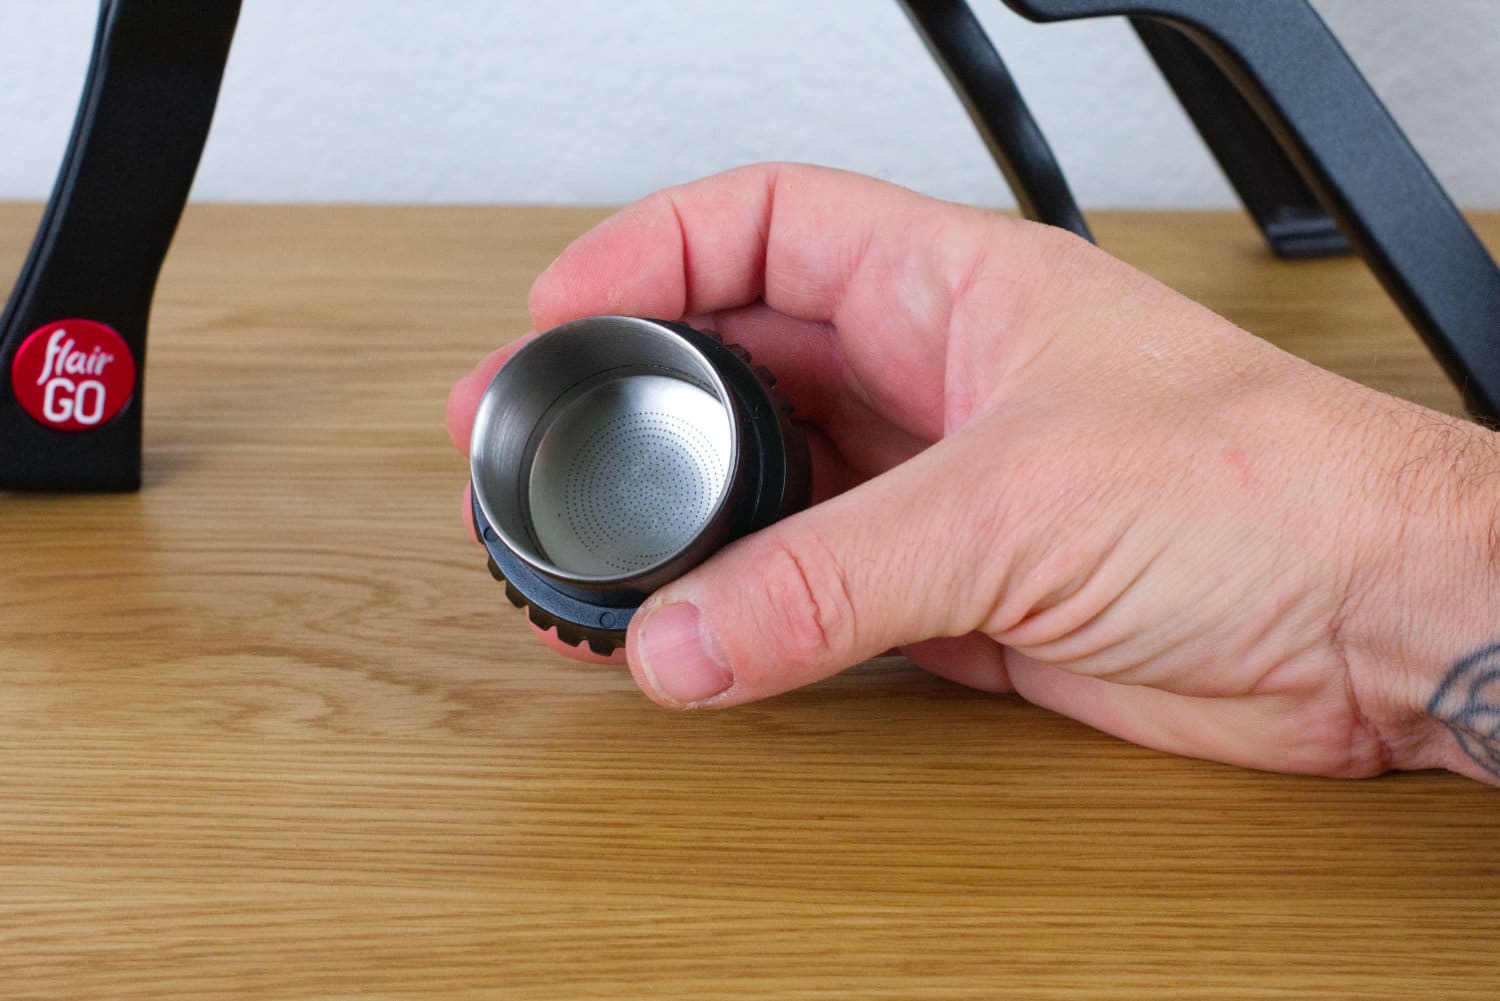
As far as I can tell, the Flair Go’s 2-in-1 portafilter is the same as what’s included with the Flair Classic. You can either use the portafilter with an included plastic attachment or keep it bottomless for best results. I recommend using the plastic attachment until you’ve fully dialed in your shots to prevent splashes and channeling.
Having just tested the Flair Pro 3, which has a much more premium portafilter with an increased capacity, this one felt like a definite step down. Sure, its capacity is advertised as 18 grams, but I’m a little dubious about that claim. Plus, the included puck screen feels rather thin, and I noticed that it quickly became clogged with coffee grounds.
With all that said, the Flair Go portafilter works like a charm, and I got great results using a dose of 15 grams of coffee during my Flair go review.
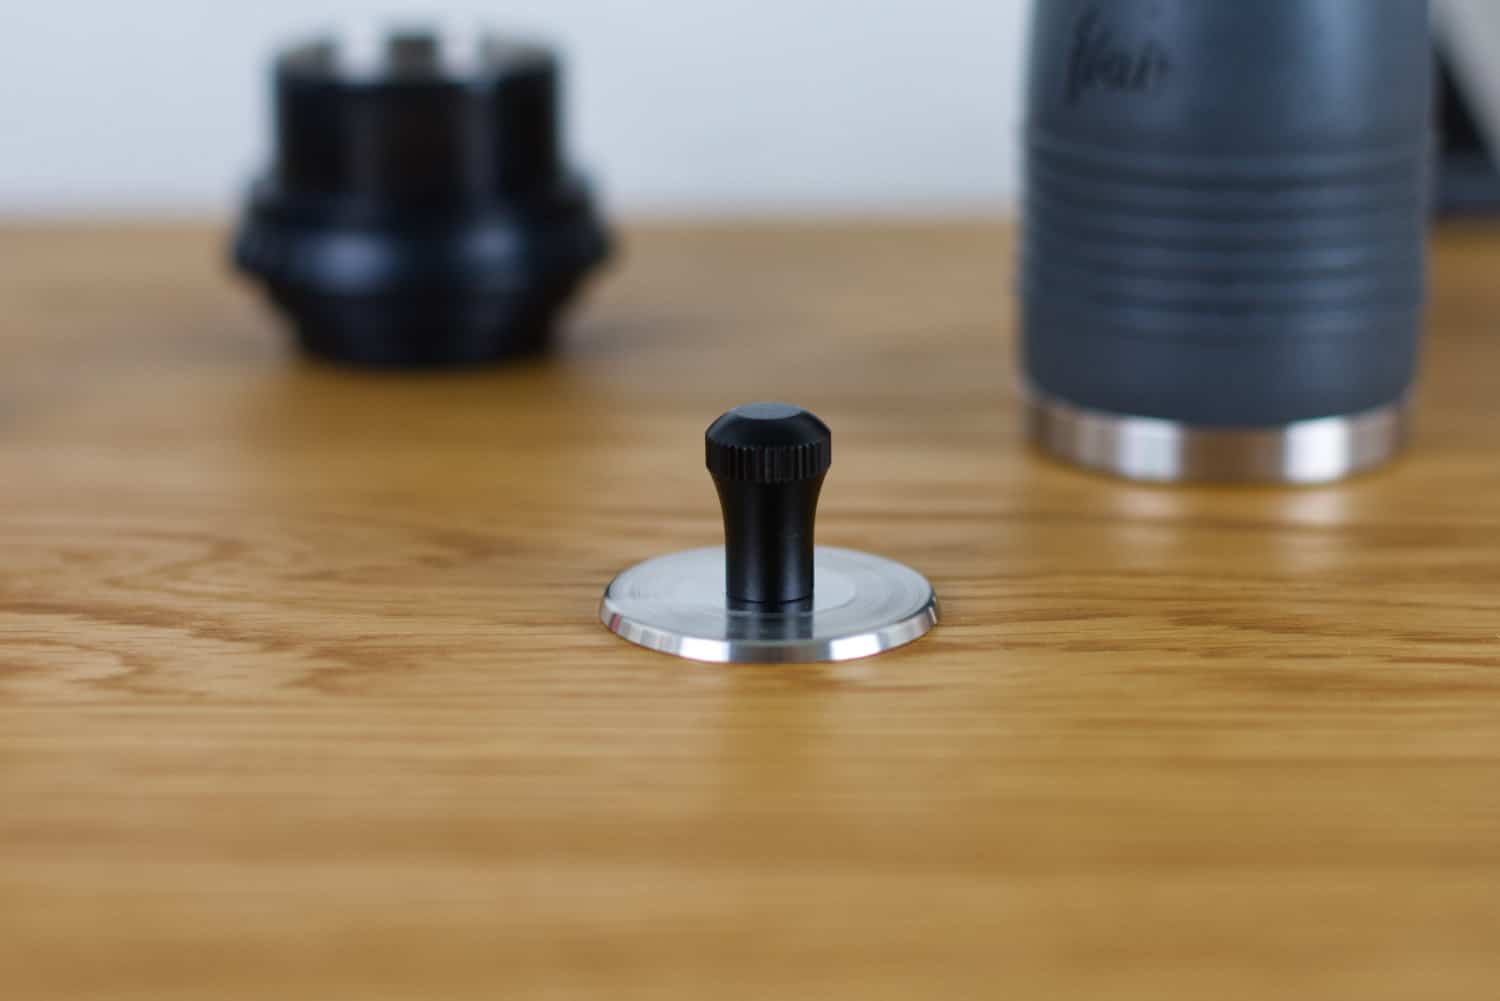
Pressure Gauge and Piston
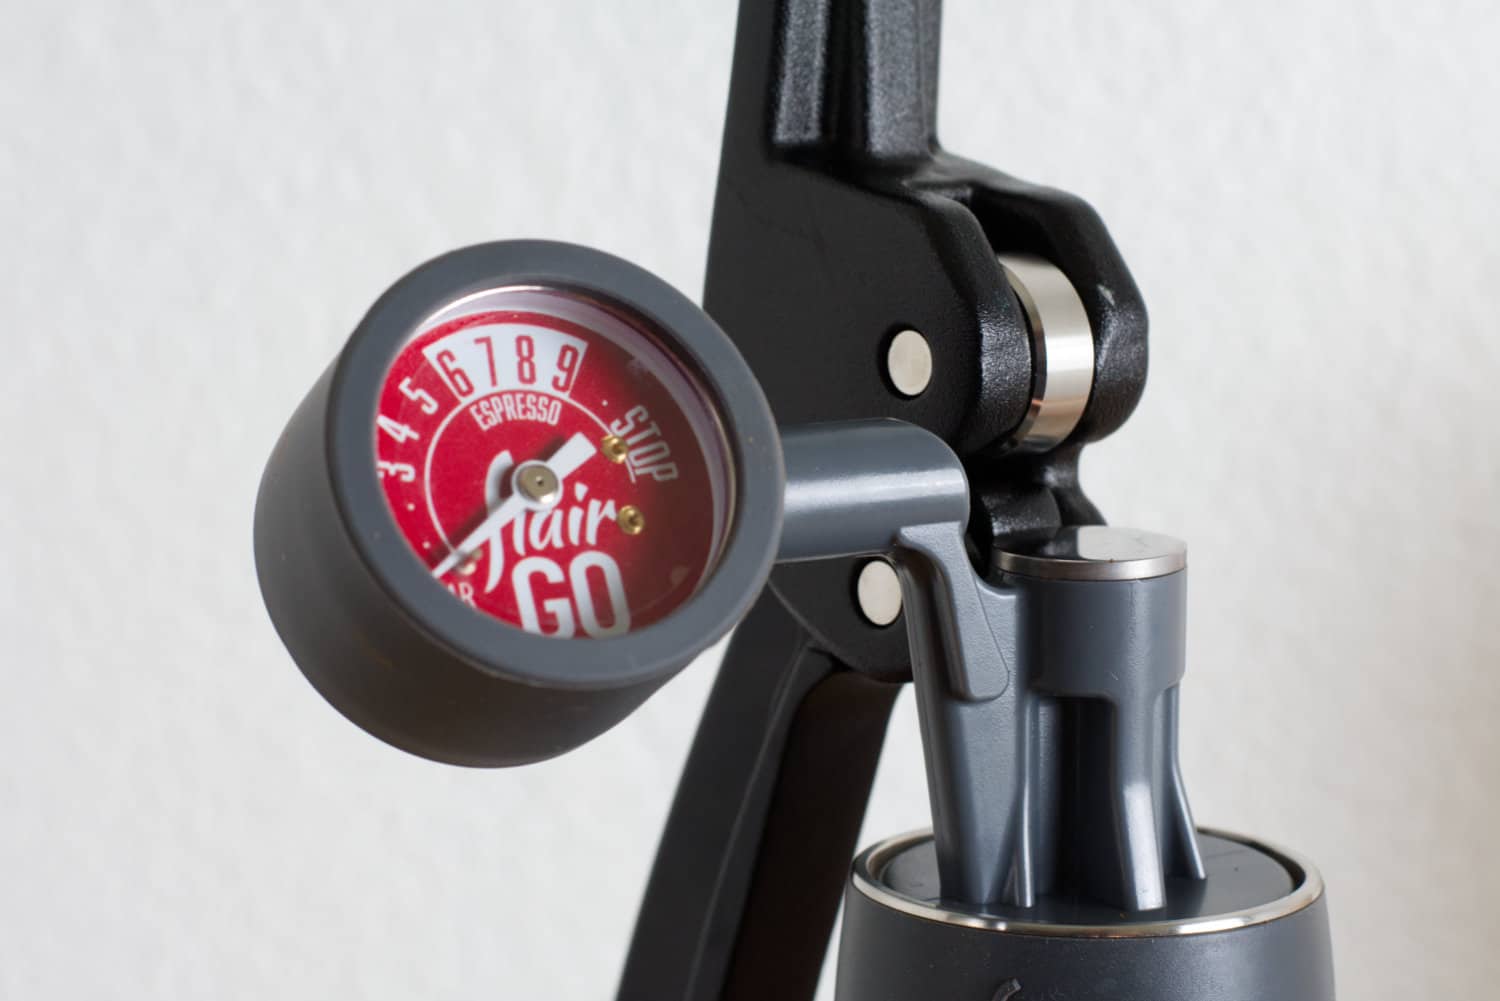
Originally an optional extra for the Flair Classic, it now seems that all the company’s models come with an integrated pressure gauge. Trust me, that’s a really good thing, seeing as trying to pull shots without it would be frustrating to say the least.
Thanks to its superb design, the Flair pressure gauge doubles as the machine’s piston. You simply place the thing on top of the brewing cylinder before gently pressing the lever into position. And as you’re beginning to pull a shot, you can easily keep an eye on how much pressure you’re exerting.
One thing I will say is that you’ll have to make sure it is level and properly aligned before starting to pull down the lever with the Flair Go. As I mentioned earlier, this model is a wee bit less stable than the Classic and Pro 3.
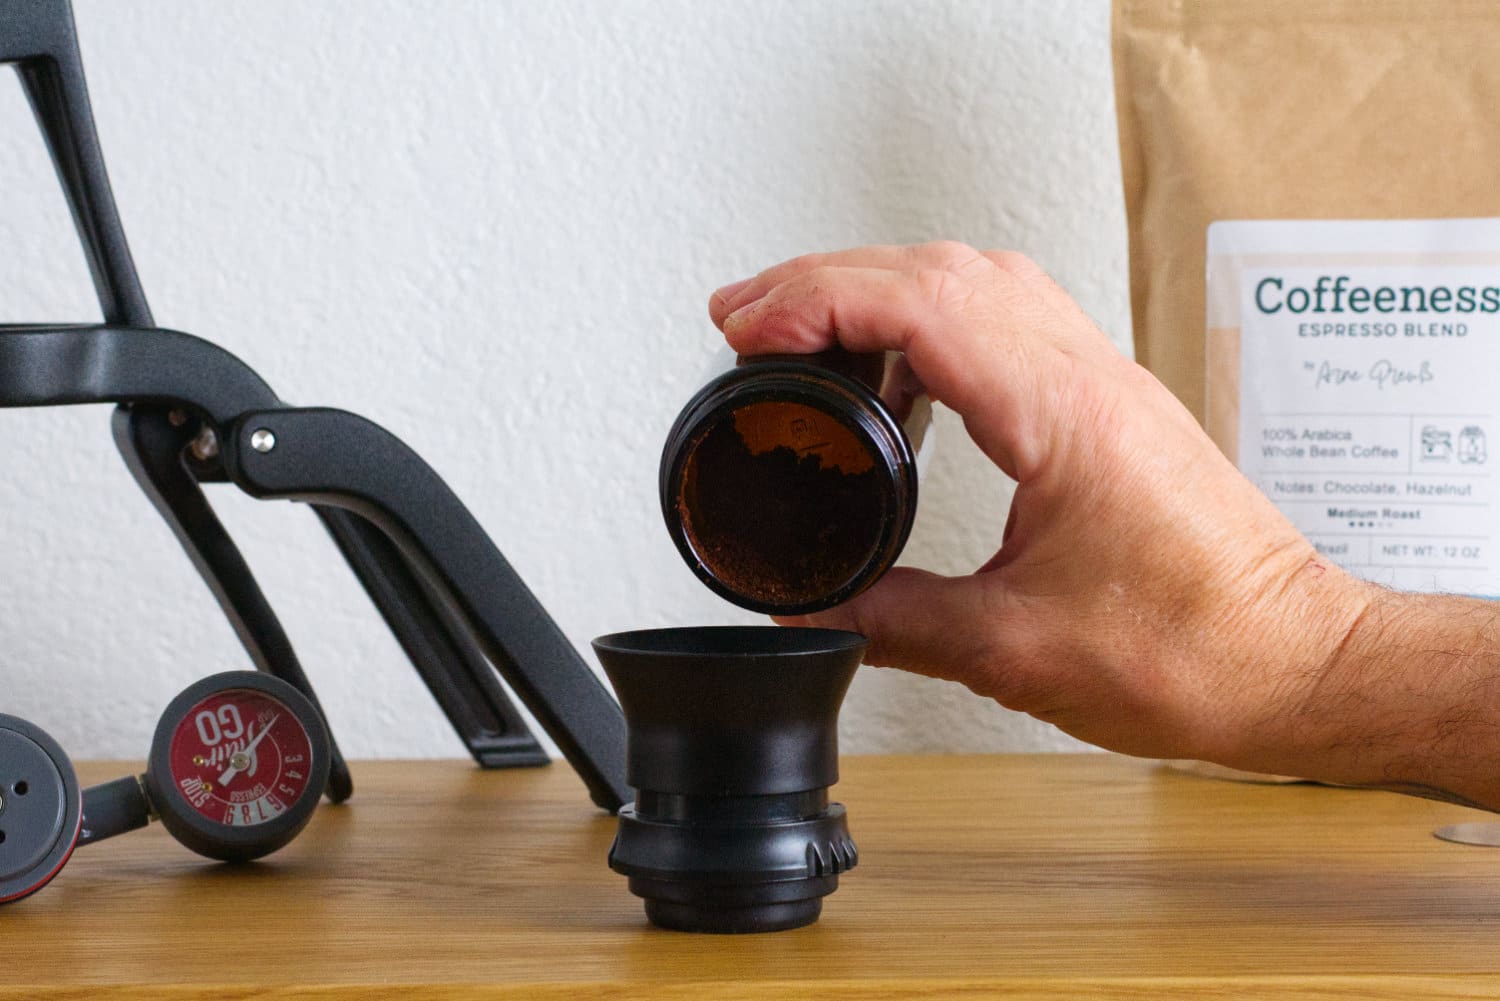
Tamper & Dosing Funnel
Probably the only thing that disappointed me during my Flair Go review was the teeny weeny tamper that comes with the machine. Sure, it’s made of metal and can do the job. However, its diameter is noticeably smaller than that of the 40mm filter basket. What’s more, it’s quite difficult to tamp firmly and evenly, seeing as you have to use the palm of your hand to generate sufficient force.
With that said, I found that using a WDT tool really helped, both with the funnel attached after dosing, and to fluff up the grounds before tamping.
Speaking of the dosing funnel, I was very relieved to find it in the Flair Go box. That’s because it’d be really difficult to dose the narrow, deep portafilter without it.
Travel Case
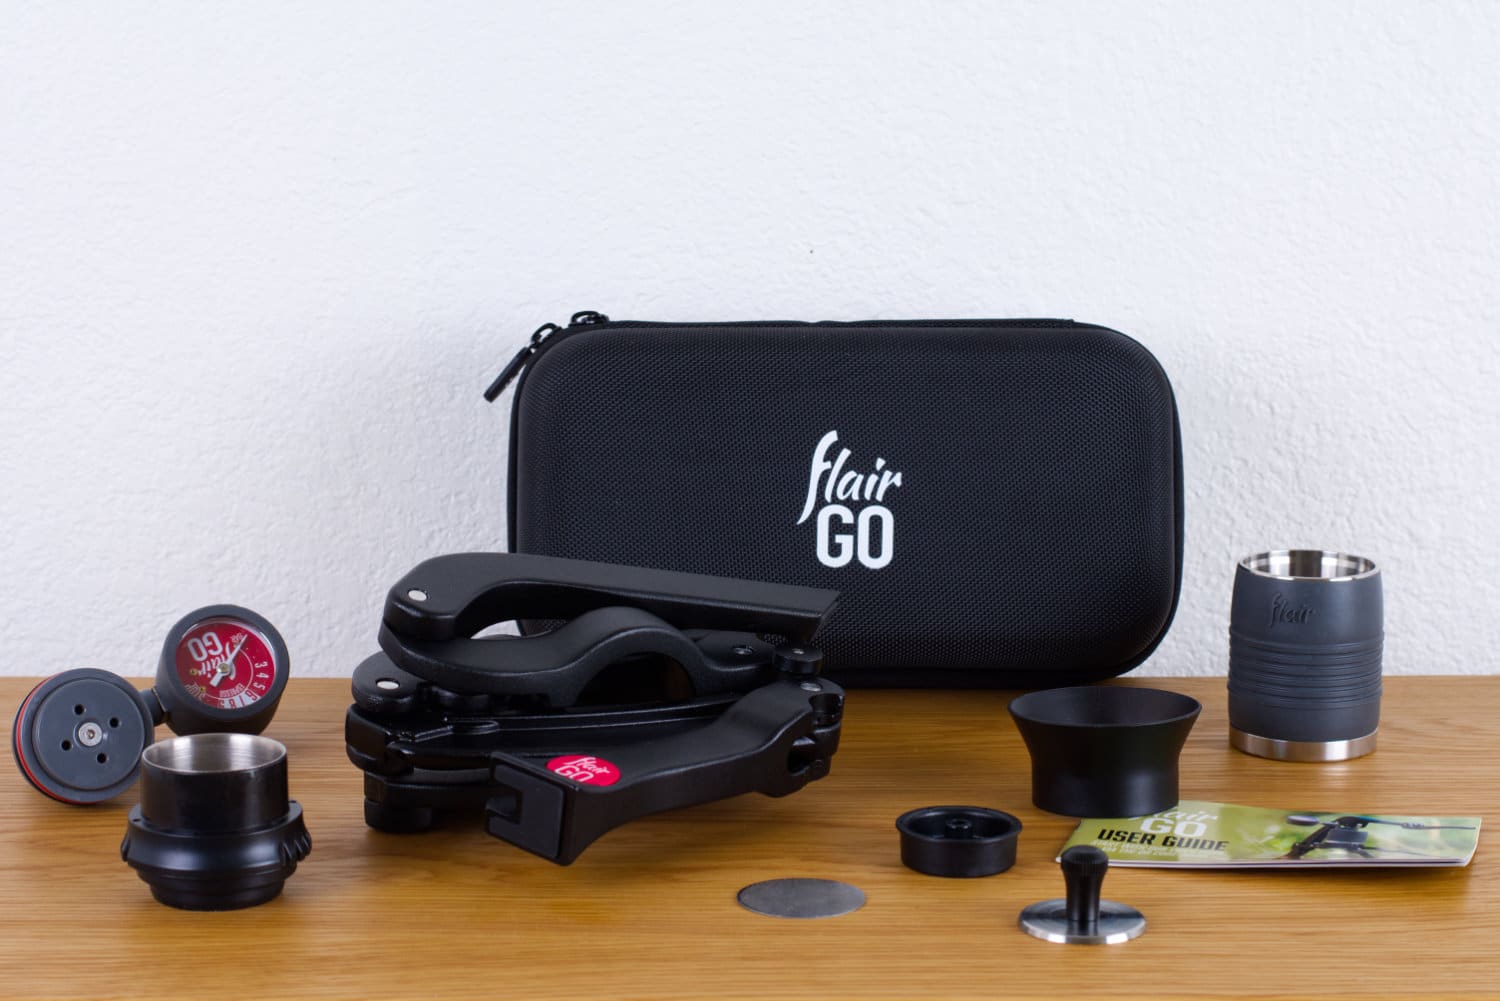
The Flair Go may be small and lightweight, but it comes with quite a few small parts that could easily get lost. Plus, the machine itself could get damaged if you just threw it in a backpack. Enter the Flair travel case, which is absolutely essential if you want to take this lever machine with you wherever you go.
The hardshell case doesn’t just look cool, it’s also very durable. Plus, there’s plush foam padding inside to protect your Flair Go Espresso Maker. Best of all, it’s way easier to fit everything in this case than it is with the Pro 3 or Classic models. Let’s call that a major win, shall we!
How Do I Use the Flair Go Portable Espresso Maker?
As I mentioned earlier in this Flair Go review, you can expect somewhat of a learning curve as you’re getting used to the machine. Still, I’d say that even novice home baristas will quickly start feeling comfortable.
Just remember: this is espresso preparation in its purest form, and you’re in complete control of the outcome. Of course, I’d recommend checking out my guide to the best espresso grinders, as well as my best coffee scale guide. After all, you’re going to need one of each to get the best out of the Flair Go.
Trust me, being able to precisely dial in your grind size as well as maintaining dose consistency are key to your success.
Espresso Preparation
Moving on, here’s how to get started with the Flair Go:
Remove all the parts from the travel case and unfold the frame. Next, preheat both the brewing cylinder and portafilter in water that’s just off the boil.
In the meantime, weigh out your preferred dose of coffee beans and grind them for espresso. Then, dry the portafilter before attaching the dosing funnel and pouring in your coffee grounds.
Settle the bed of ground coffee using a WDT tool, then remove the funnel and tamp firmly and evenly on a level surface.
Place the prepared portafilter on the frame, before placing the dispersion screen on top of the puck. Then, attach the brewing cylinder.
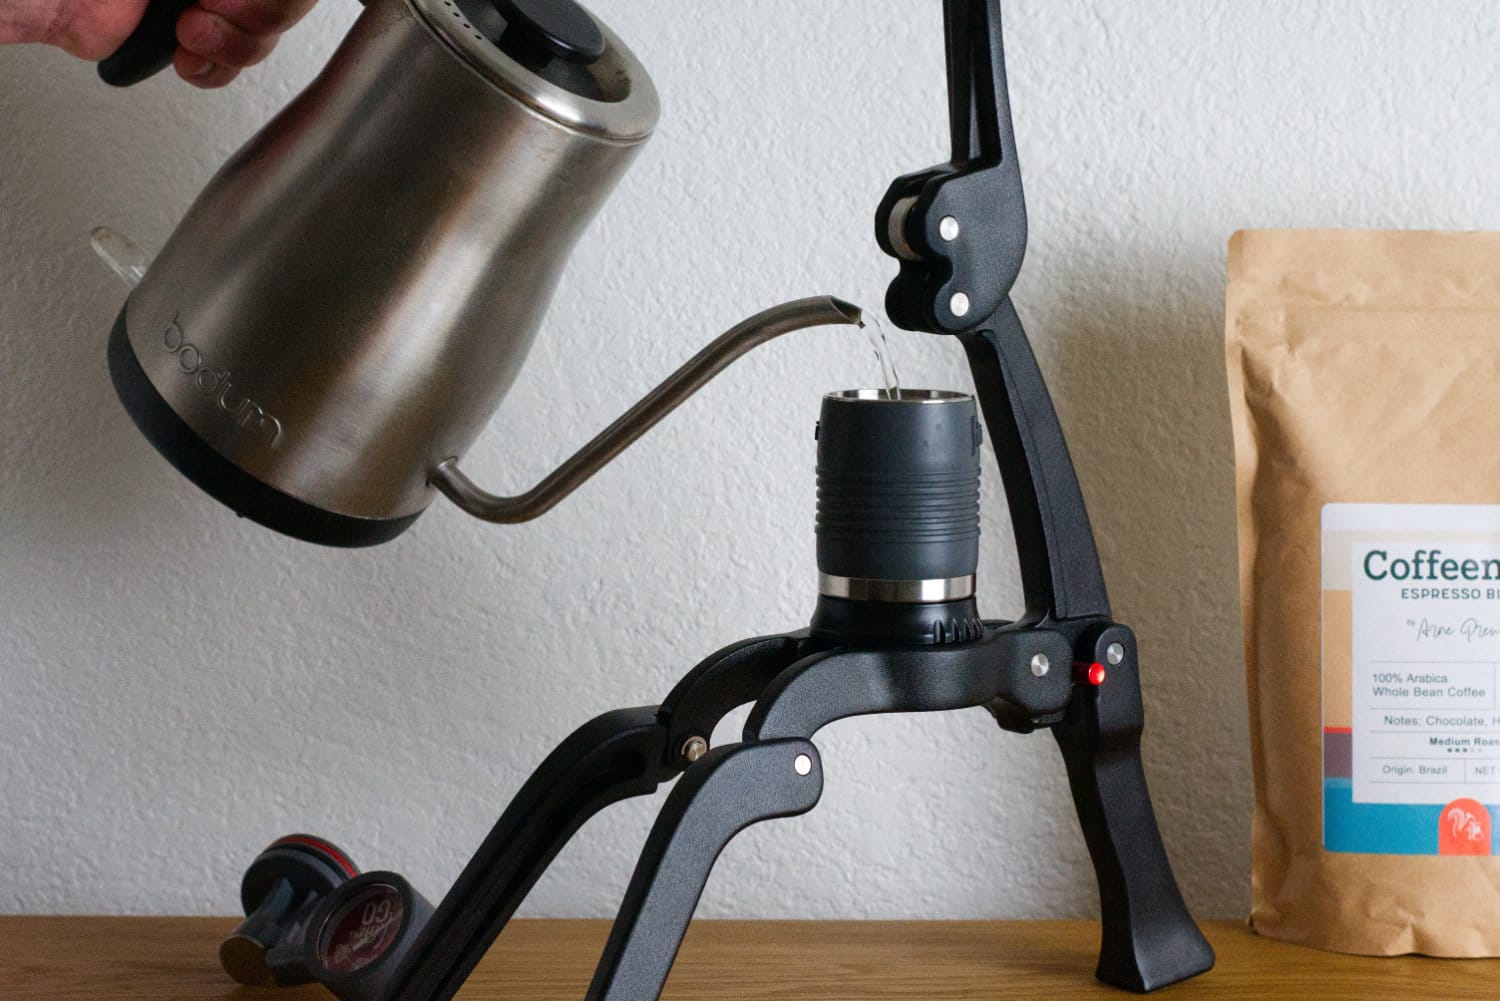
Now it’s time to slowly add boiling water to the cylinder, being careful to avoid filling past the etched line inside.
Finally, gently place the piston/pressure gauge onto the cylinder, then pull the lever down until it’s touching.
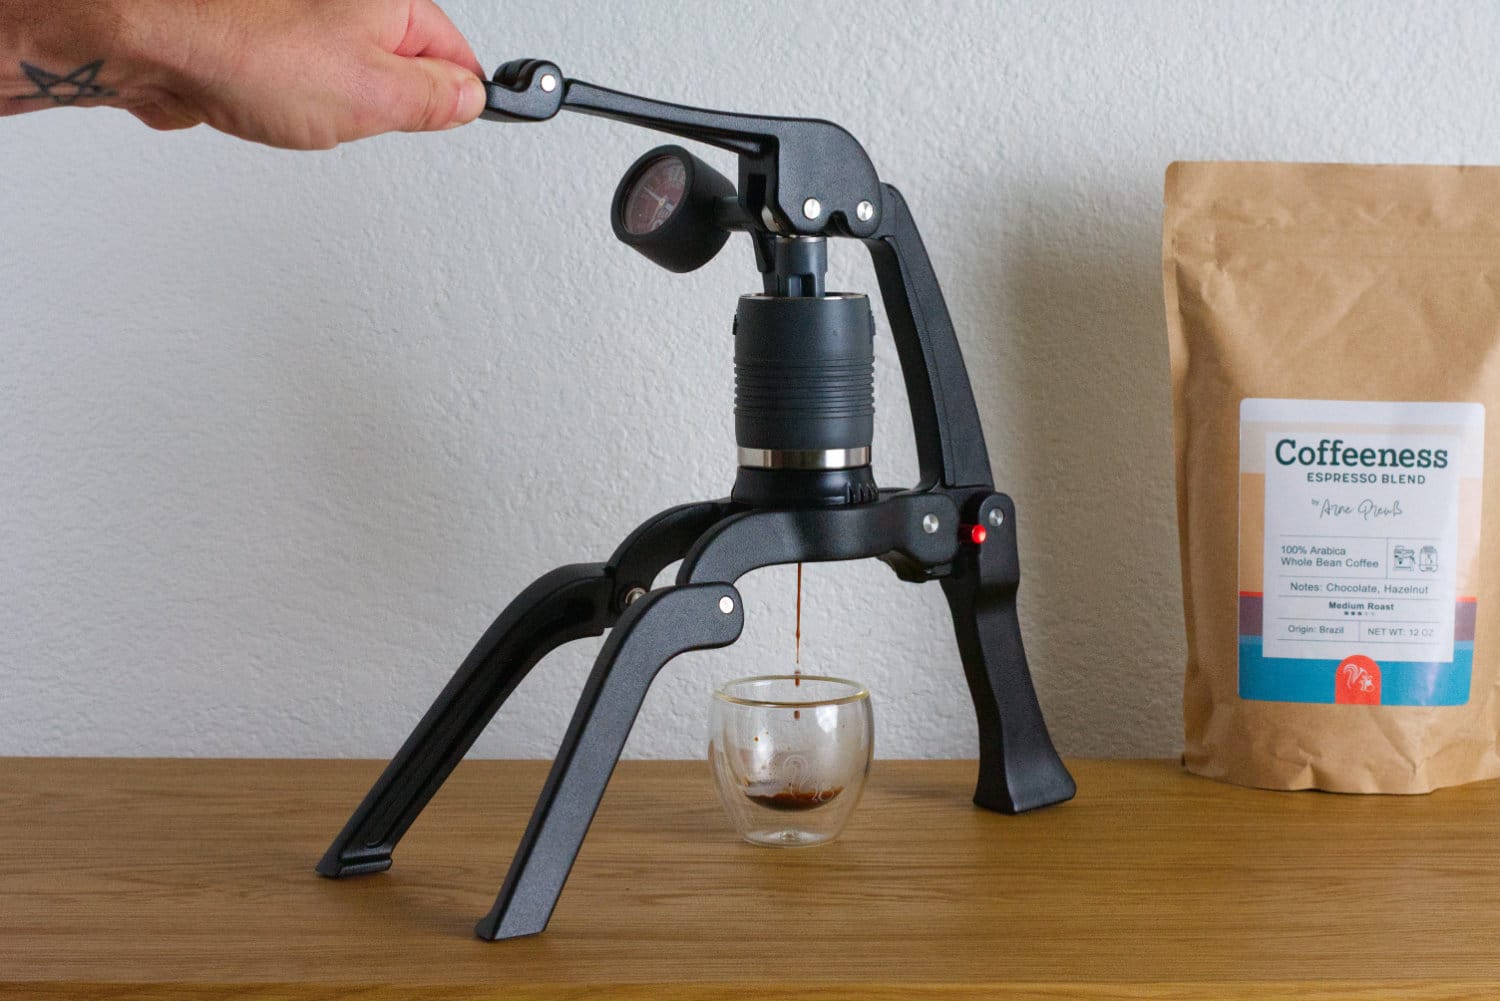
To pull your shot, tare an espresso cup on your scale, then begin to pull the lever toward you to preinfuse your coffee puck. After a few seconds, begin to apply more pressure, keeping an eye on the pressure gauge.
If all goes well, you’ll see the needle hover anywhere from 6-9 bars during the espresso extraction. The whole extraction process should take between 25 and 35 seconds, and your espresso yield should be roughly twice your dose of coffee.
How Does Espresso From the Flair Go Taste?
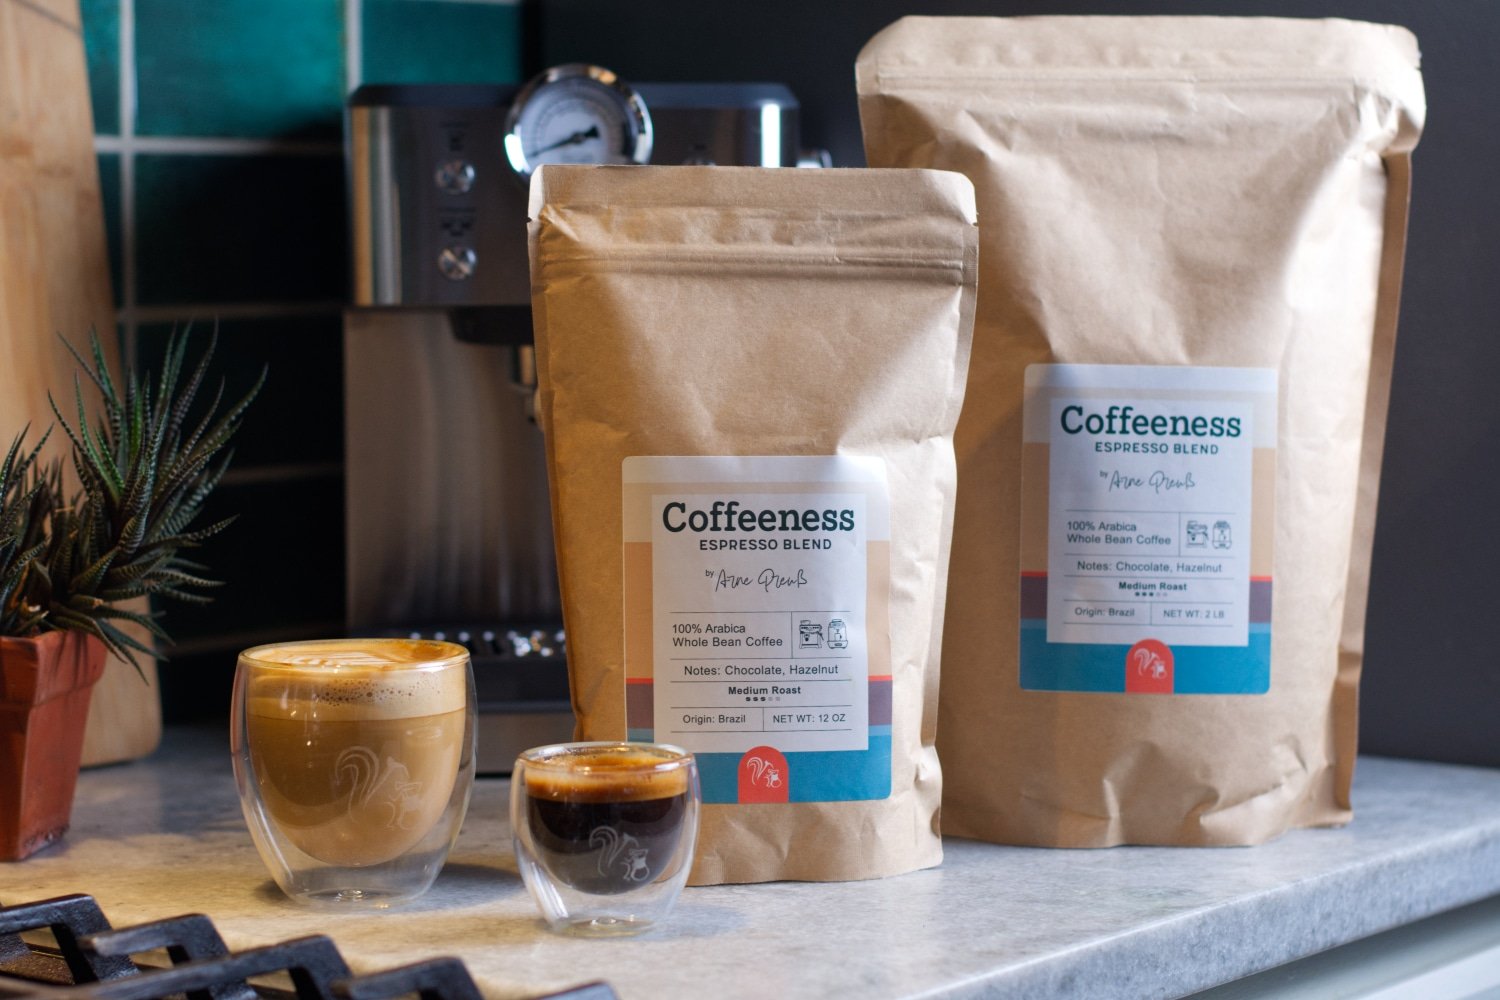
Coffeeness Medium Roast Espresso
Well-balanced with chocolate & hazelnut notes
Freshly roasted in Brooklyn
Very low acidity
During the testing phase of my Flair Go review, I used my beloved Comandante hand grinder. After all, if you’re going to be using this machine out in the wild, you aren’t going to be bringing an electric grinder. While the Comandante isn’t the best manual grinder for espresso, it is capable enough. And once I’d dialed in the correct grind setting (9 clicks from zero), I managed to pull some fantastic shots with the Flair Go.
I tested the Flair with both a light roast blend and my Coffeeness Signature Espresso Roast. In both cases, I got the best results with a 15-gram dose of coffee and an 8-second pre-infusion. I also stuck with a 1:2 brew ratio, and found that I was able to extract roughly 30 grams of espresso in around 28 seconds.
As I mentioned earlier, it’s vital that you preheat the brewing cylinder. In my experience, once the cylinder was toasty, my shots were well-balanced, complex and syrupy. Plus, I loved how the Flair Go produced espresso with a thick layer of aromatic crema. In short, this baby can make espresso that’s as good as you’ll get from a fancy machine costing a whole lot more.
How Do I Clean the Flair Go Espresso Machine?
To be honest, cleaning the Flair Go Espresso Machine is about as easy as it gets. There’s very little to take care of, although you will have to get into the habit of performing a few basic tasks after each use.
For starters, I recommend completely emptying the brewing chamber before removing it from the portafilter. That way, you won’t be left with a soupy mess in the filter basket. Then, simply knock out the used puck before giving the portafilter a good rinse.
The only other thing to take care of is the puck screen, which you’ll likely need to scrub fairly well. As I mentioned earlier, I noticed that the screen retains coffee particles, which could build up and negatively affect your espresso shots.
Flair Go Specifications
| Flair Go Portable Manual Espresso Machine | |
| Manufacturer | Flair Espresso |
|---|---|
| Model number | GO “Grounds” |
| Product category | Manual espresso machine |
| Housing material | Stainless steel |
| Color options | Black, Forest Green |
| Milk frother | None |
| User interface | None |
| App | |
| User profiles | Memo function only |
| Portafilter size | 41 mm |
| Tamping | Manual |
| Removable water reservoir | |
| Water reservoir capacity | N/A |
| Number of boilers | 1 |
| Pump pressure | 9 bar |
| Maximum cup height | 5.0 in / 12.7 cm |
| Grinder | N/A |
| Grind adjustment levels | N/A |
| Bean hopper capacity | N/A |
| Specialty drinks | 1 |
| Pre-infusion | |
| Adjustable coffee temperature | |
| Adjustable milk foam temperature | |
| 2-cup function | No |
| Hot water function | |
| Hot milk function | |
| Milk foam only option | |
| Water filter | |
| Power consumption | |
| Weight | 4.0 lb / 1.8 kg |
| Dimensions | 10.5 x 5.0 x 12.0 in |
| Warranty | 5 years |
| Notes | Included Accessories: User manual, dosing funnel, puck screen, pressure gauge, metal tamper |
| Current price on Amazon | $149.00 |
| All specifications | |
Flair Go vs Other Portable Espresso Makers
If something compact and portable sounds like your idea of the best home espresso machine, there are tons of options out there. Let’s take a look at how the Flair Go measures up in comparison with a couple of other manual espresso makers.
Flair Go vs Picopresso
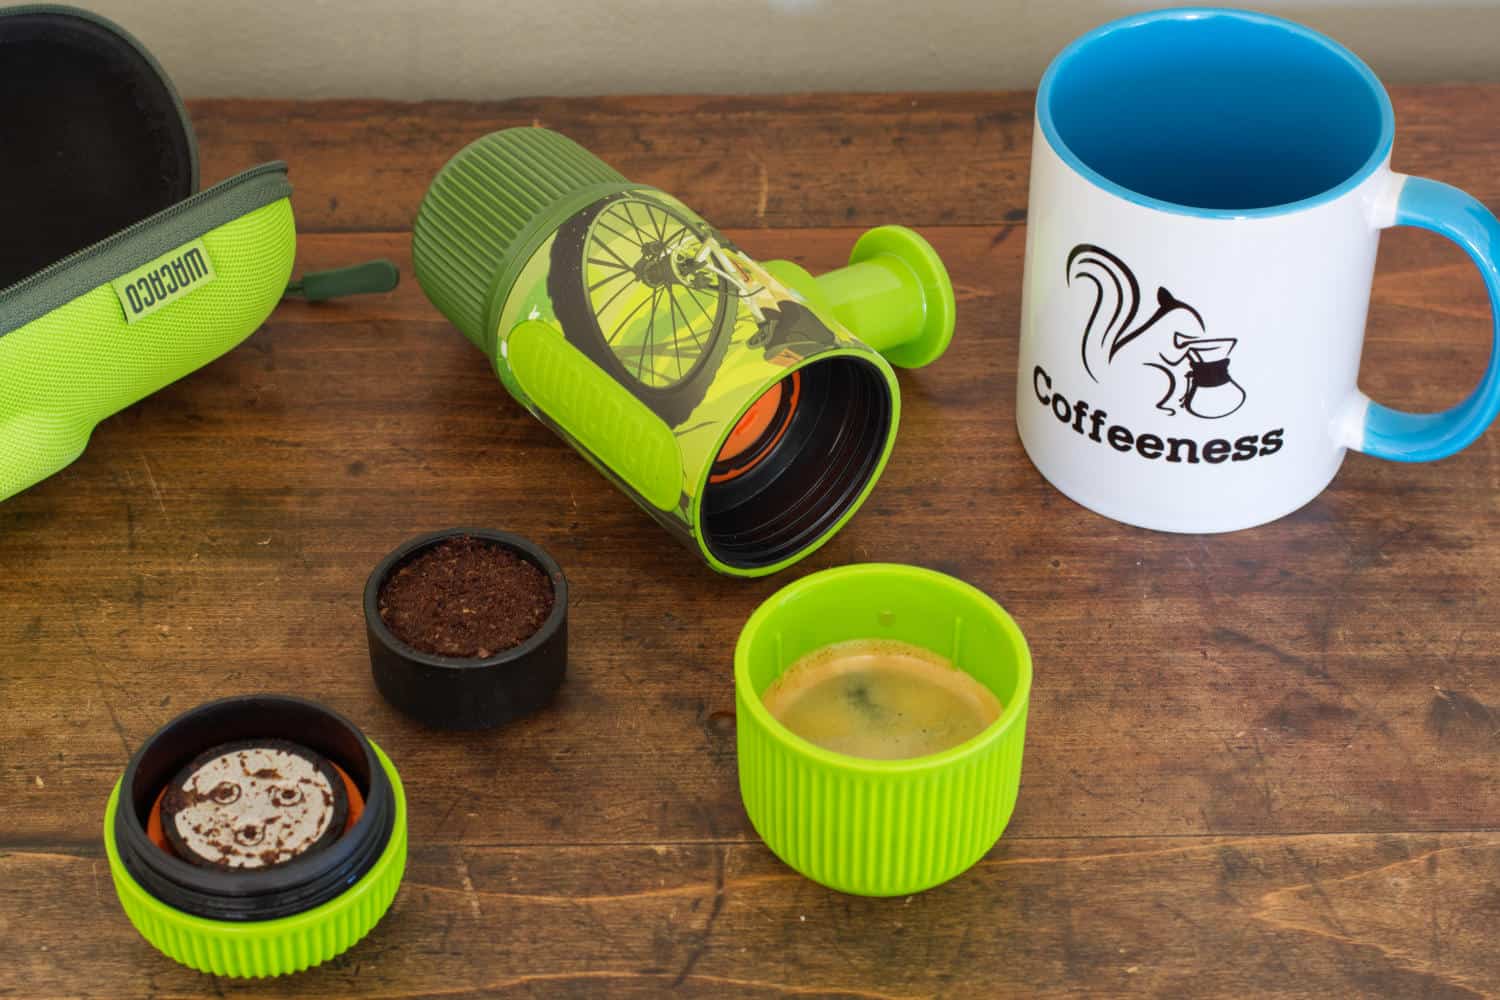
I absolutely love the WACACO Nanopresso, and it’s now one of my camping essentials.
While I haven’t tested the WACACO Picopresso, it’s based around the same concept. Rather than a lever, this super compact espresso maker employs a pump action piston to generate the pressure necessary for espresso. What’s more, the Piopresso features a single wall 52mm filter basket and comes with a metal tamper, dosing collar and distribution tool.
Costing $129.90, the WACACO Picopresso doesn’t look like much. However, it’s capable of producing authentic espresso shots and is extremely easy to use. In my opinion, this is one of the best camping coffee makers on the market.
Related: WACACO Nanopresso Review
Flair Go vs Classic

Costing $194.00, the original Flair Classic Espresso Machine is only a little more expensive than the Flair Go. What you’re spying for is a more substantial lever assembly as well as a sturdy frame. And while the Flair Go is definitely more travel friendly, the Classic comes with its own travel case and is certainly portable.
Other than that, I’d say these two Flair models are very similar in terms of performance – you can be sure that either will produce very tasty espresso. Of course, if you’re willing to spend a little more, I’d highly recommend the , which is kind of like the classic on steroids.
See Also: Flair Espresso Maker Review
Verdict: Flair Go Review
Compact and travel-friendly
Flair Go Portable Manual Espresso Machine
A very capable portable manual lever machine
Foldable frame
Easy to set up
Makes superb espresso
Pressure gauge included
Somewhat of a steep learning curve
| Flair Go Portable Manual Espresso Machine | |
| Manufacturer | Flair Espresso |
|---|---|
| Model number | GO “Grounds” |
| Product category | Manual espresso machine |
| Housing material | Stainless steel |
| Color options | Black, Forest Green |
| Milk frother | None |
| User interface | None |
| App | |
| User profiles | Memo function only |
| Portafilter size | 41 mm |
| Tamping | Manual |
| Removable water reservoir | |
| Water reservoir capacity | N/A |
| Number of boilers | 1 |
| Pump pressure | 9 bar |
| Maximum cup height | 5.0 in / 12.7 cm |
| Grinder | N/A |
| Grind adjustment levels | N/A |
| Bean hopper capacity | N/A |
| Specialty drinks | 1 |
| Pre-infusion | |
| Adjustable coffee temperature | |
| Adjustable milk foam temperature | |
| 2-cup function | No |
| Hot water function | |
| Hot milk function | |
| Milk foam only option | |
| Water filter | |
| Power consumption | |
| Weight | 4.0 lb / 1.8 kg |
| Dimensions | 10.5 x 5.0 x 12.0 in |
| Warranty | 5 years |
| Notes | Included Accessories: User manual, dosing funnel, puck screen, pressure gauge, metal tamper |
| Current price on Amazon | $149.00 |
| All specifications | |
I had a blast during my Flair Go review. Then again, I wasn’t at all surprised, seeing as I’ve had great experiences using the company’s other models. Ultimately, this particular model is absolutely ideal for those who want an authentic espresso experience while traveling.
Thanks to its intelligent design and ease of use, the Flair Go can whip up excellent shots in a hurry. Sure, it’s not as easy as just pressing a button. However, experimenting with a manual lever machine like this is loads of fun. And you really can’t argue with the Flair Go’s asking price – this thing is an absolute steal for what you’re getting.
Do you own the Flair Go Manual Lever Espresso Machine? Do you agree with my assessment? Feel free to share your thoughts in the comments section!
Flair Go FAQ
Thanks to its collapsible frame, easy setup and hard shell travel case, the compact Flair Go is extremely portable.
While you’ll have an easier time using a gooseneck kettle with the Flair Go, you can also use any water kettle.
There is a specific pod model of the Flair Go Espresso Machine.