

Regular Coffeeness readers know that I absolutely love playing with manual espresso makers. So I’m super excited about this Flair Pro 3 review. Since my first experience using a Flair manual lever machine a couple of years ago, the company has released a ton of new models. I guess that must mean that more and more folks are discovering the joys of preparing espresso by hand.
Anyway, Flair was kind enough to send me the Pro 3 Manual Espresso Machine to test out, and I’ve spent the last couple of days in espresso-nerd heaven.
It almost goes without saying that the manufacturer’s generosity didn’t affect the way I evaluated the machine. You can be sure that my Flair Pro 3 review is completely unbiased, and if there’s something I didn’t like you’ll definitely hear about it.
Better than the original
Flair Pro 3
A fantastic manual espresso maker
Makes superb espresso
Great fun to use
Shot mirror and pressure gauge included
Lightweight and portable
Steep learning curve
| Flair Pro 3 | |
| Manufacturer | Flair Espresso |
|---|---|
| Model number | PRO 3 |
| Product category | Manual espresso machine |
| Housing material | Stainless steel |
| Color options | Black, White |
| Milk frother | None |
| User interface | None |
| App | |
| User profiles | Memo function only |
| Portafilter size | 46 mm |
| Tamping | Manual |
| Removable water reservoir | |
| Water reservoir capacity | N/A |
| Number of boilers | 1 |
| Pump pressure | 9 bar |
| Maximum cup height | 5.0 in / 12.7 cm |
| Grinder | N/A |
| Grind adjustment levels | N/A |
| Bean hopper capacity | N/A |
| Specialty drinks | 1 |
| Pre-infusion | |
| Adjustable coffee temperature | |
| Adjustable milk foam temperature | |
| 2-cup function | No |
| Hot water function | |
| Hot milk function | |
| Milk foam only option | |
| Water filter | |
| Power consumption | N/A |
| Weight | 7.0 lb / 3.2 kg |
| Dimensions | 10.0 x 6.3 x 12.5 in |
| Warranty | 5 years |
| Notes | Included Accessories: User manual, pressure gauge, dosing cup, dosing collar, portafilter spout, dispersion screen, metal tamper, carrying case |
| Current price on Amazon | $325.00 |
| All specifications | |
Table of Contents
Flair Pro 3 Review Overview
If you’ve checked out my review of the Flair Classic, you’ll know that I struggled to get the hang of the thing at first. However, I went into this Flair Pro 3 review feeling pretty confident, seeing as I knew how to set up the machine.
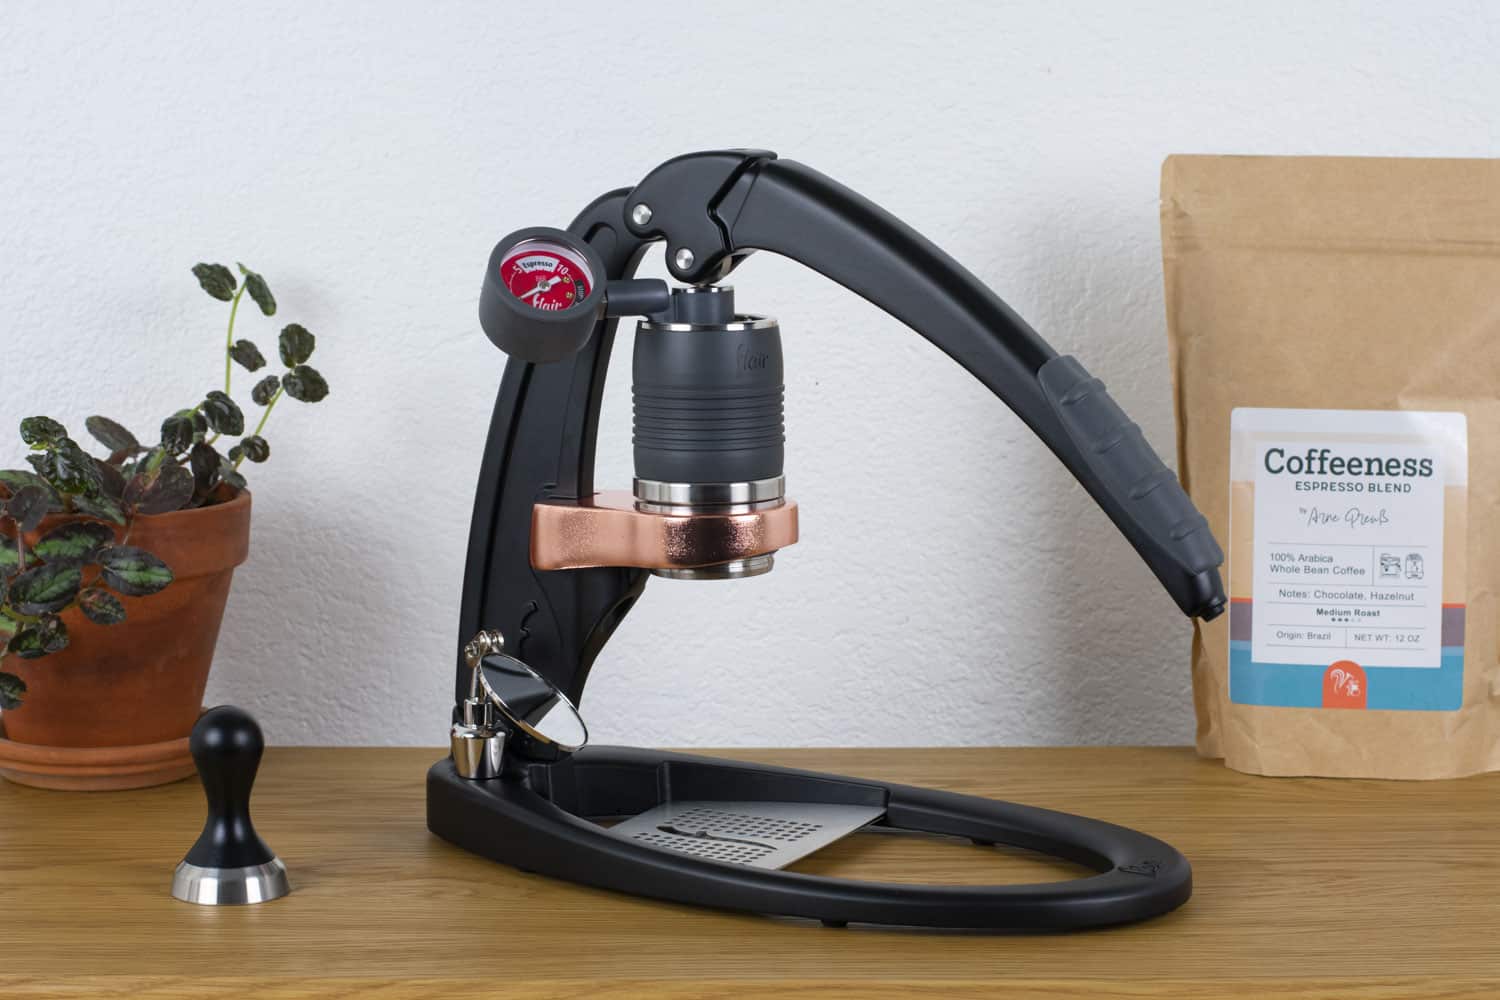
The first thing I noticed was that the manufacturer has definitely made some improvements. While the basic components are the same, the build quality and design have been really dialed in. I particularly appreciated the Flair Pro 3’s rugged construction as well as thoughtful touches like a rubber grip on the lever and a gorgeous brass-effect cylinder holder. Oh, and the Flair Pro 3 Espresso Maker comes with a pressure gauge and metal tamper as standard.
Costing $325.00, the Flair Pro 3 represents a substantial financial investment, especially given the fact that this manual lever machine doesn’t have milk steaming capabilities. What’s more, you’re going to need a burr coffee grinder that’s good enough to use for espresso preparation.
However, if you’re a home barista that loves to experiment, and you demand hands-on control over every aspect of your espresso shots, the Flair Pro 3 will be right up your alley.
Sure, this manual espresso maker demands extra effort and patience from the user. But it’s capable of producing exceptional results. It might not end up being your daily driver, but it can rival the best prosumer espresso machines costing thousands of dollars.
Flair Pro 3 Espresso Maker Features
Let’s continue this Flair Pro 3 review by digging into the features that make it one of the best home espresso machines out there.
Build Quality and Design
As I already mentioned, it’s immediately apparent that the Flair Pro 3 is more sturdy and premium than its predecessor. Clocking in at 7 pounds (3.2 kilograms), the Pro 3 is 2 pounds heavier than the Classic, making it feel more stable when you’re pulling a shot. Plus, the anodized aluminum cylinder holder adds a touch of class, adding to the machine’s premium aesthetic.
The Flair Pro 3 is easy to assemble, seeing as there are just two main parts – the base and the lever assembly. With that said, you do have to use the included screw, or else the whole thing is too wobbly. Incidentally, I should mention that Flair has also upgraded the drip tray, which was just a single piece of plastic on the Classic. Here, you get an actual drip tray and cover, both of which are made of shiny metal. The only downside is that the drip tray will be too small for most coffee scales. For example, I wasn’t able to fit my Fellow Tally Pro scale on there.
Brewing Cylinder
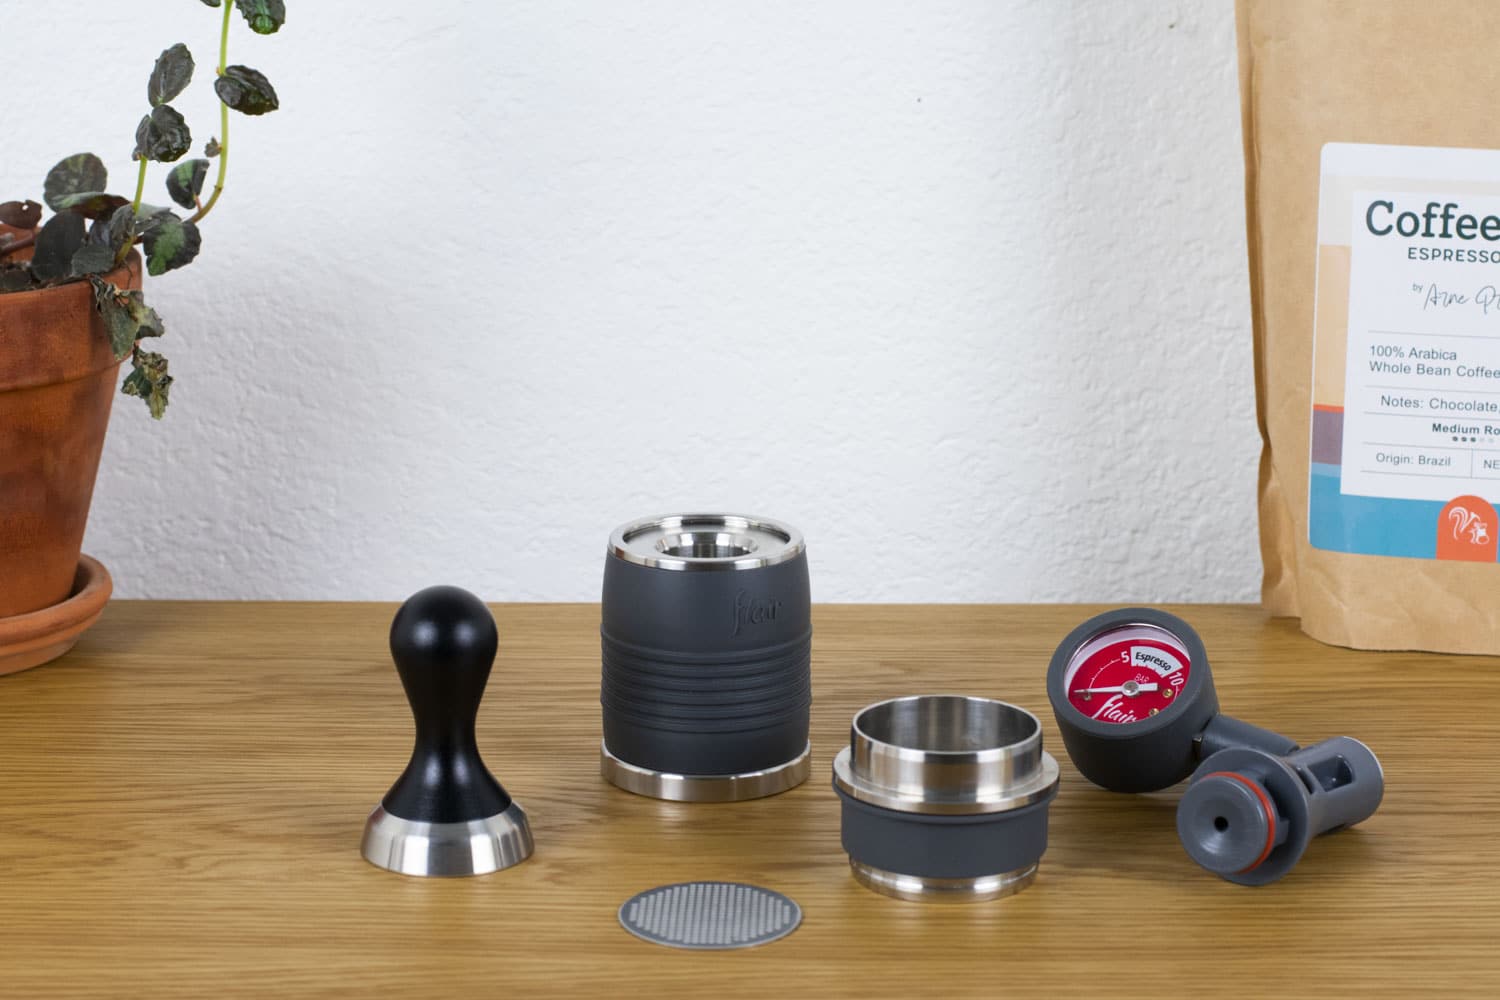
The design of the Flair brewing cylinder really impressed me during my review of the Classic Espresso Maker. For the Flair Pro 3, the manufacturer has increased the brewing chamber capacity to 2.4 ounces (70 milliliters). What’s more, the chamber now features thinner metal construction, supposedly meaning that it doesn’t need to be preheated. At the same time, the cylinder feels more sturdy, and the silicone collar looks and feels more premium.
In practice, Flair’s “no preheat” claim didn’t really stand up in my testing. Without heating the cylinder and the portafilter, my shots just weren’t hot enough and tasted sour. With that in mind, you can use the included preheat funnel, which sits on your kettle as you’re boiling water. But that method didn’t work very well, so I came up with a better solution. Don’t worry, it’s really quick and easy to heat all the parts properly, and I’ll explain how to do it a little later.
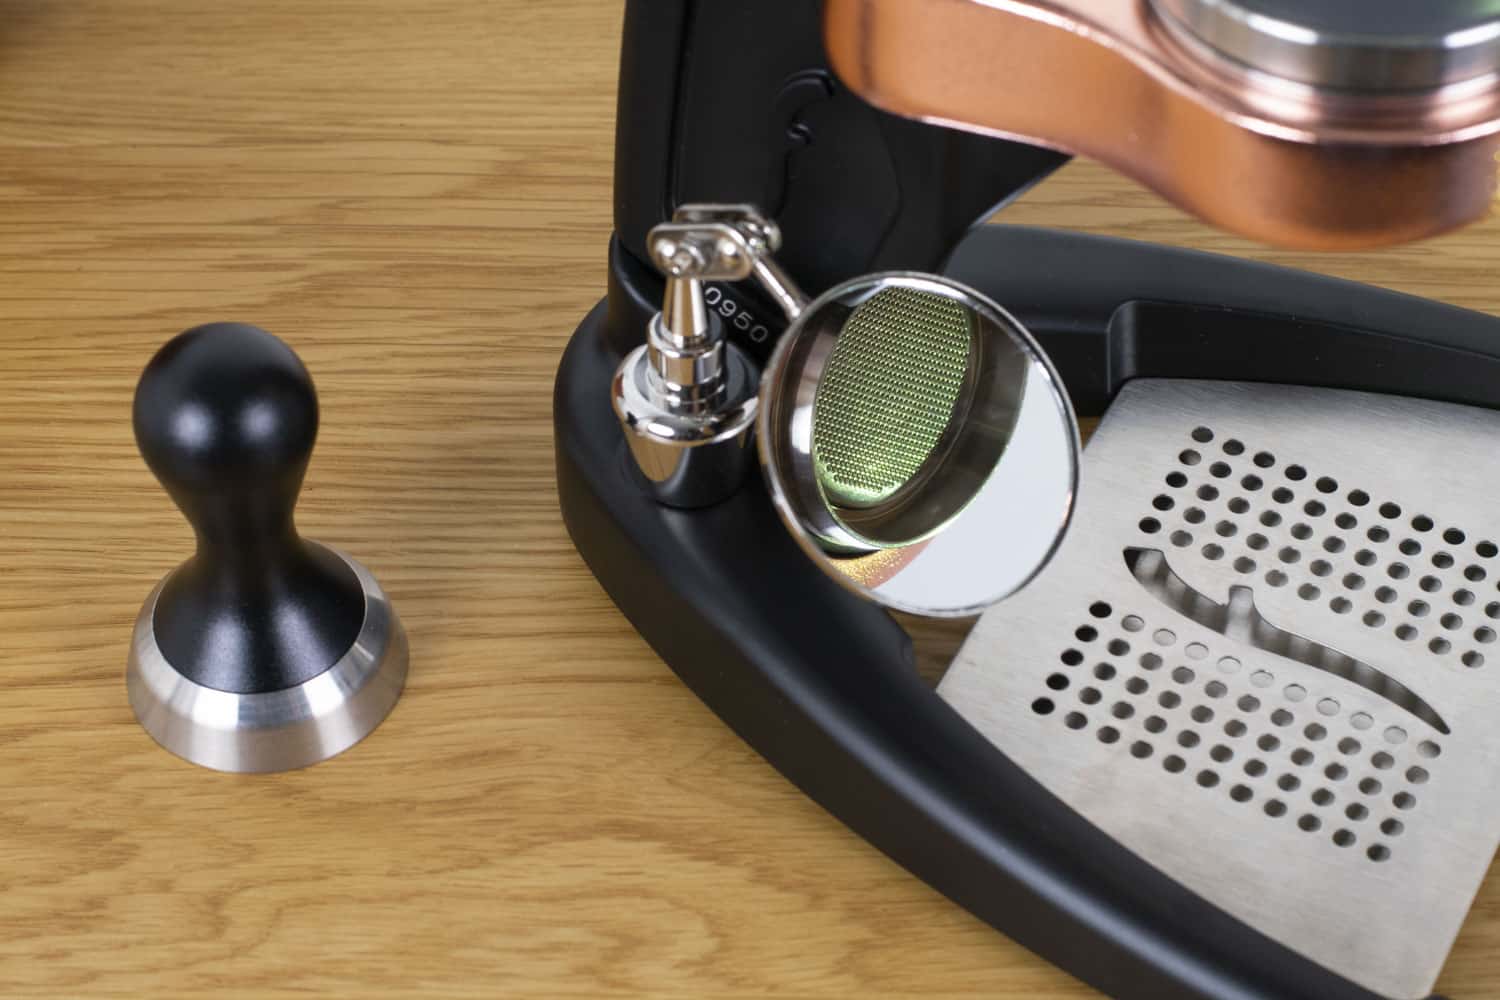
Bottomless Portafilter
The Flair Pro 3’s bottomless portafilter is a huge improvement on the Flair’s 2-in-1 portafilter. For starters, it has a larger 24-gram capacity, and in combination with the larger brewing chamber, this means your maximum yield is 1.9 ounces (56 milliliters). Plus, the 46 mm portafilter comes with a better dispersion screen and feels weightier and more rugged.
As I mentioned above, you will have to heat the portafilter to get the best results, but it does have a nice silicone collar, so I didn’t end up burning my fingers and cursing like a pirate during my Flair Pro 3 review!
Pressure Gauge
The Flair pressure gauge is absolutely fantastic, and integrates into the design of the espresso maker like a dream. Doubling up as a piston, the pressure gauge sits on top of the brewing cylinder, and I can’t imagine trying to pull shots without it.
Seriously, the pressure gauge is super responsive, and lets you accurately experiment with pre-infusion. Plus, seeing as it clearly shows the 6-9 bar “espresso zone,” the gauge helps you develop the necessary muscle memory when you’re pulling a shot. Trust me, you’ll be surprised by how much muscle power it takes to create the requisite pressure for espresso extraction, so the pressure gauge is invaluable here.
Finally, the gauge helps you to diagnose any issues with your grind size and dose, so you can quickly make changes without having to guess.
Tamper
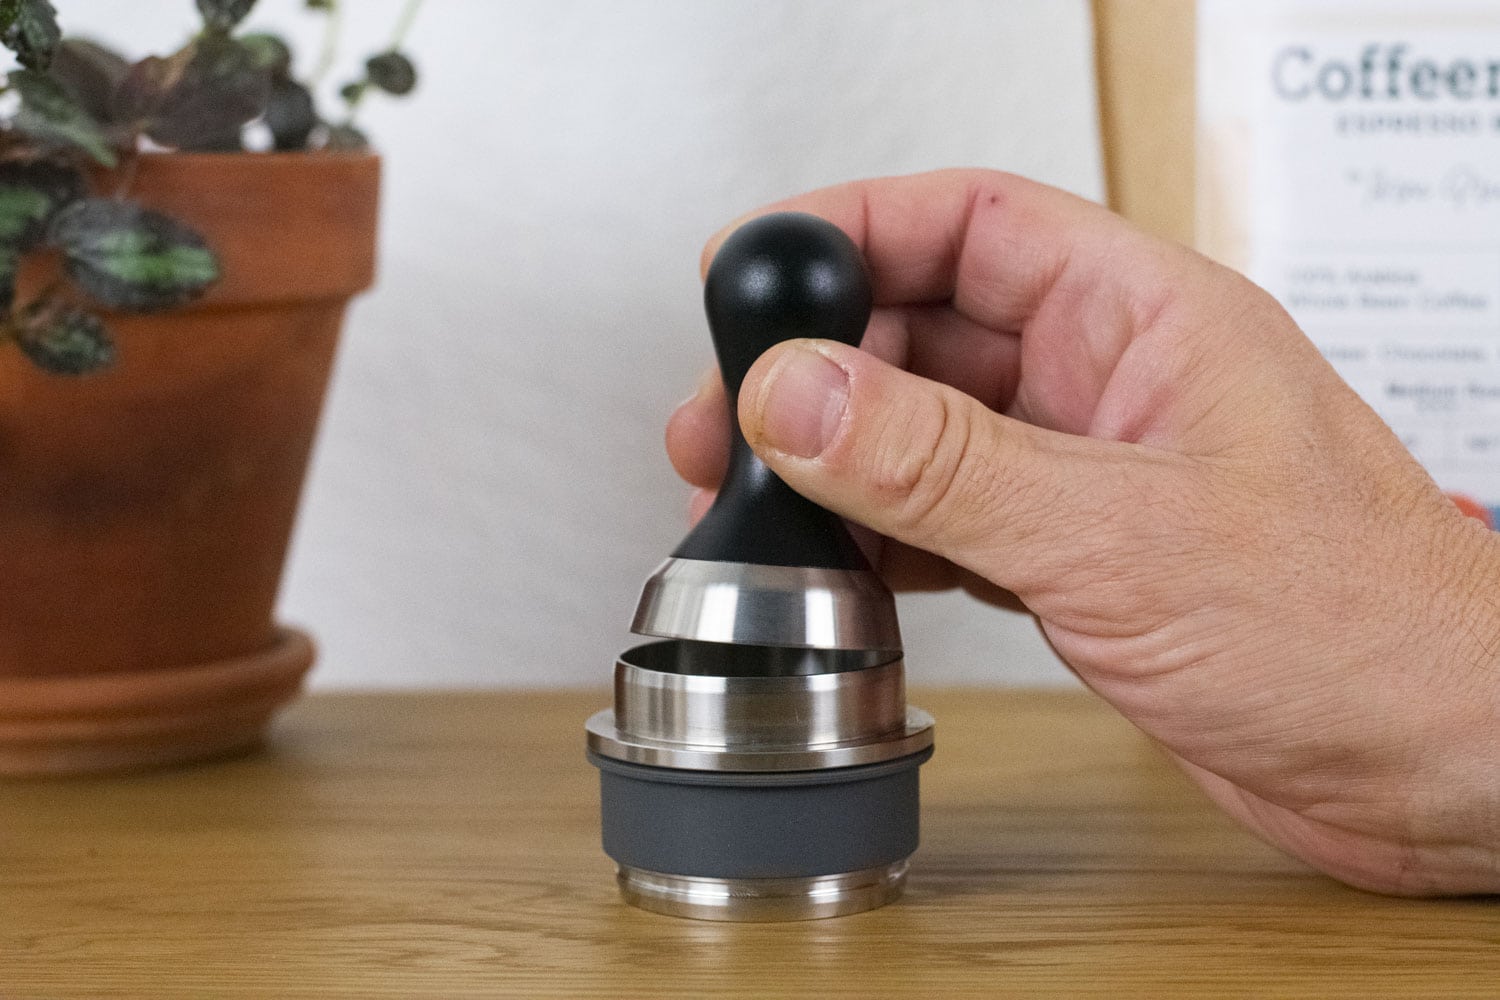
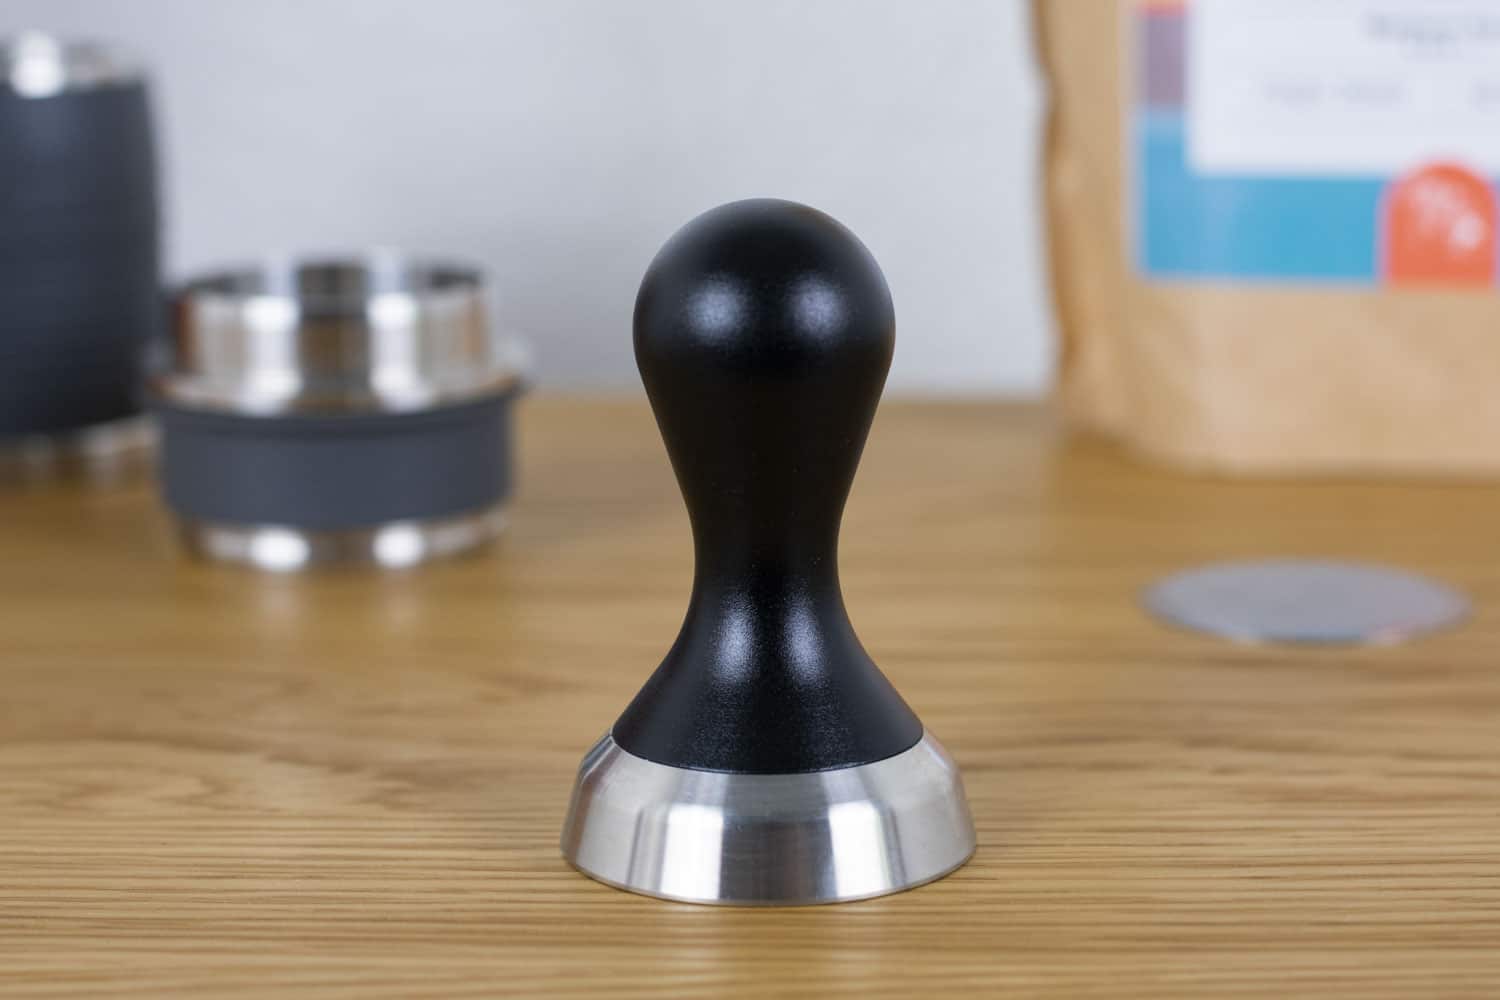
The Flair Pro 3 comes with a cute little tamper that kind of looks like something you’d get with a “My First Espresso Machine” toy. Don’t be fooled, though – this durable metal tamper is heavier than it looks, and works really well in the Flair portafilter. With that said, I noticed that it’s a little difficult to achieve a level surface, which is vital for an even extraction. So, make sure to tamp firmly and carefully when you’re preparing your puck. Oh, and using a WDT tool really helps.
Dosing Cup and Collar
As part of the Flair Pro 3 package, you’ll get a plastic dosing cup and collar, both of which can come in very handy.
Personally, I didn’t use the dosing cup at all during my testing seeing as I was using my Comandante hand grinder. Instead, I simply transferred ground coffee to the portafilter straight from the grinder’s collection chamber. However, the included dosing collar came in very handy, both for keeping the grounds from spilling as I was pouring into the portafilter and for settling them.
Incidentally, I found that the best method for dosing the portafilter was to add ground coffee then settle by gently tapping the thing on a hard surface before using a WDT tool to eliminate clumps.
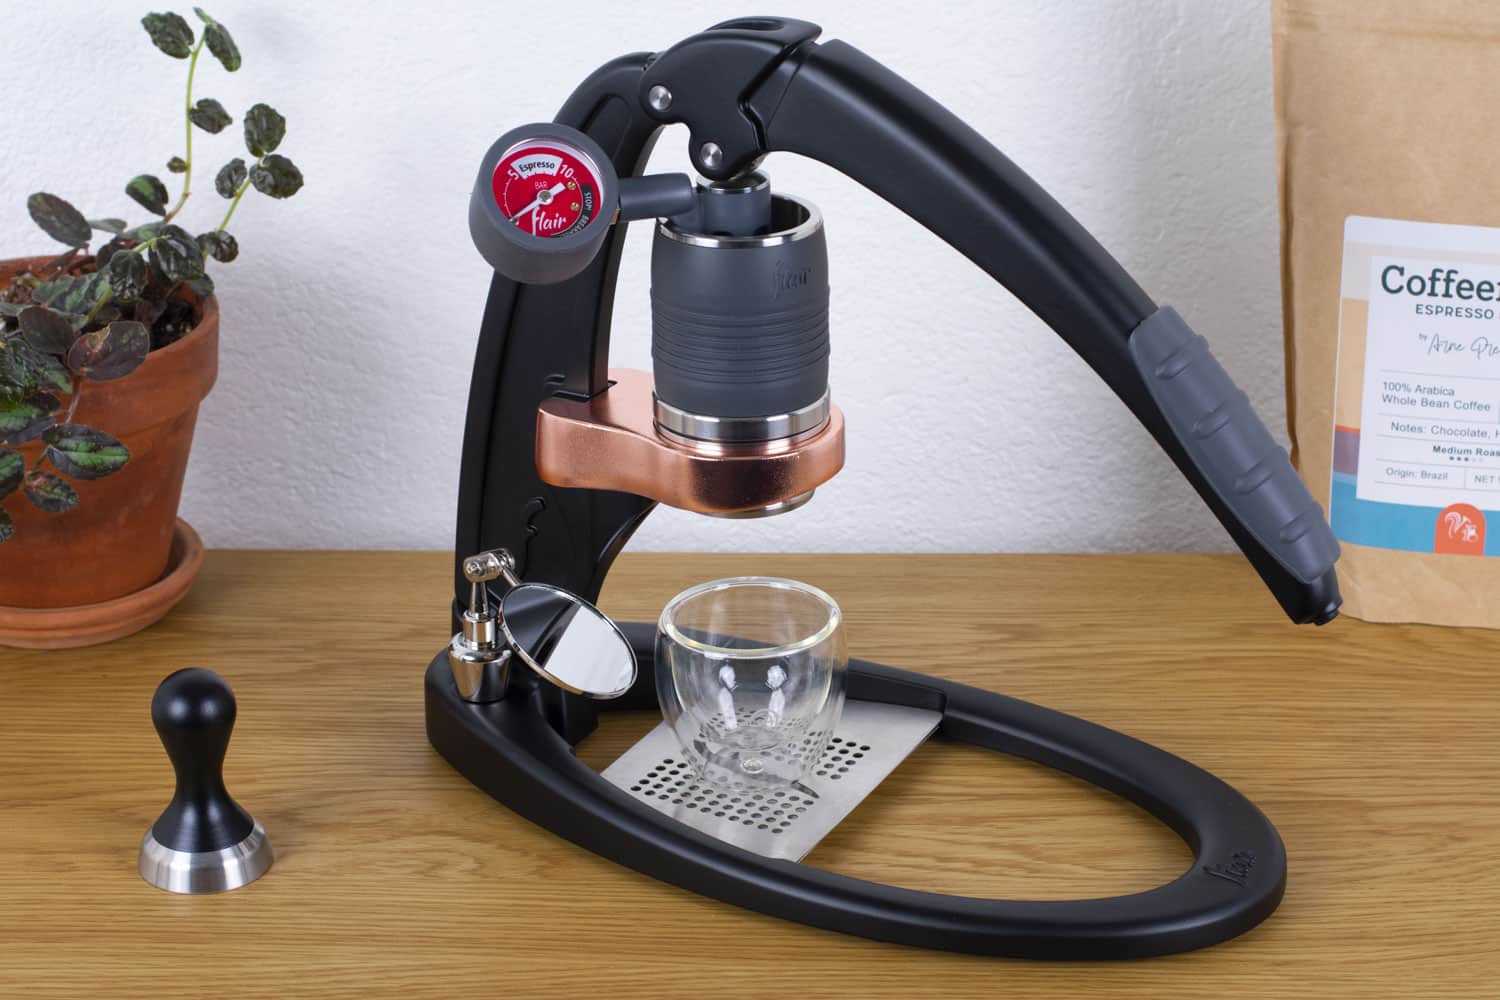
Shot Mirror
The Flair shot mirror attaches to the espresso maker’s base via a magnet, and allows you to watch your espresso shot as it’s oozing out of the portafilter. To be honest, I feel like this feature is more of a novelty than anything, but it is fun to use. Then again, complete espresso freaks will claim that the mirror offers a valuable way to monitor your extraction and diagnose any problems that might not otherwise be easy to identify.
Travel Case
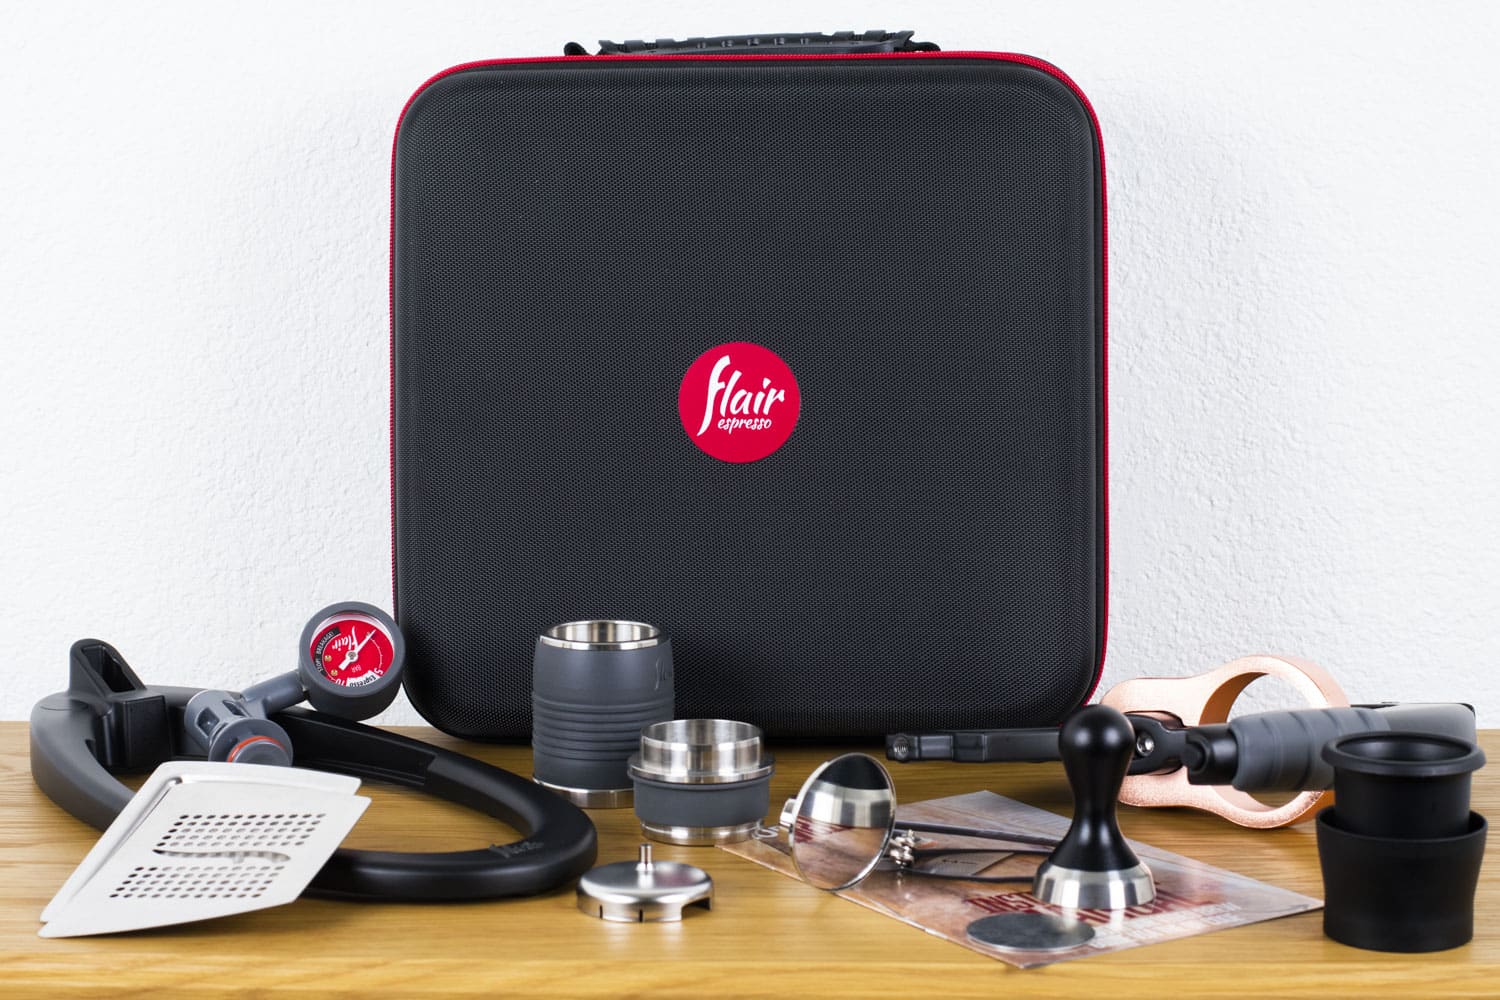
The Flair Pro 3 Espresso Maker has been designed as a travel-friendly machine, although I’m not sure I’d want to take the thing camping. Still, if you want to take the Pro 3 on the road you’ll be happy to hear that it comes with a mega premium hard shell travel case.
Inside, there’s an abundance of precision cut foam padding, although fitting all the parts in there can feel like playing Tetris in real life.
So, allow me to offer you a pro tip: take a photo of all the parts in the travel case before unpacking it for the first time. Trust me, this will save you a lot of time and potential frustration.
How Do I Use the Flair Pro 3?
To be honest, using the Flair Pro 3 really isn’t hard at all, even though it might seem intimidating at first glance.
Still, the fact remains that getting the best out of this manual machine involves a substantial learning curve and you’ll need plenty of time and patience. What’s more, you’ll need the best espresso grinder you can get your hands on, as well as a decent coffee scale. Ultimately, the Flair Pro 3 isn’t for everyone, but dedicated home baristas in search of the purest form of espresso preparation will get a lot of joy from this device.
As I mentioned earlier, the Flair Pro 3 removable components need to be preheated if you want consistently tasty shots.
For the brewing cylinder, I attached the pressure gauge then balanced the thing upside down using the base for support. Then, I poured boiling water inside and let it sit for a minute. As for the portafilter, I simply submerged it in a cup of hot water. Sure, that could result in hot fingers as you remove it from the cup, but quickly grabbing the silicone collar means you won’t get burned.
Espresso Preparation
Once you’ve attached the lever assembly to the base and put the drip tray in place, it’s time to pull a shot of espresso with the Flair Pro 3. Here’s how to do it:
Add fresh, filtered water to your best gooseneck kettle. While it’s boiling, weigh out your coffee beans and grind them.
Once the kettle has boiled, preheat both the brewing cylinder and the portafilter. Then, dry the portafilter, pop on the dosing collar and add your ground coffee.
Once you’ve settled and distributed the ground coffee in the portafilter, remove the collar and tamp down firmly and evenly to create a level puck.
Next, place the portafilter in its holder on the lever assembly and gently lay the puck screen on top.
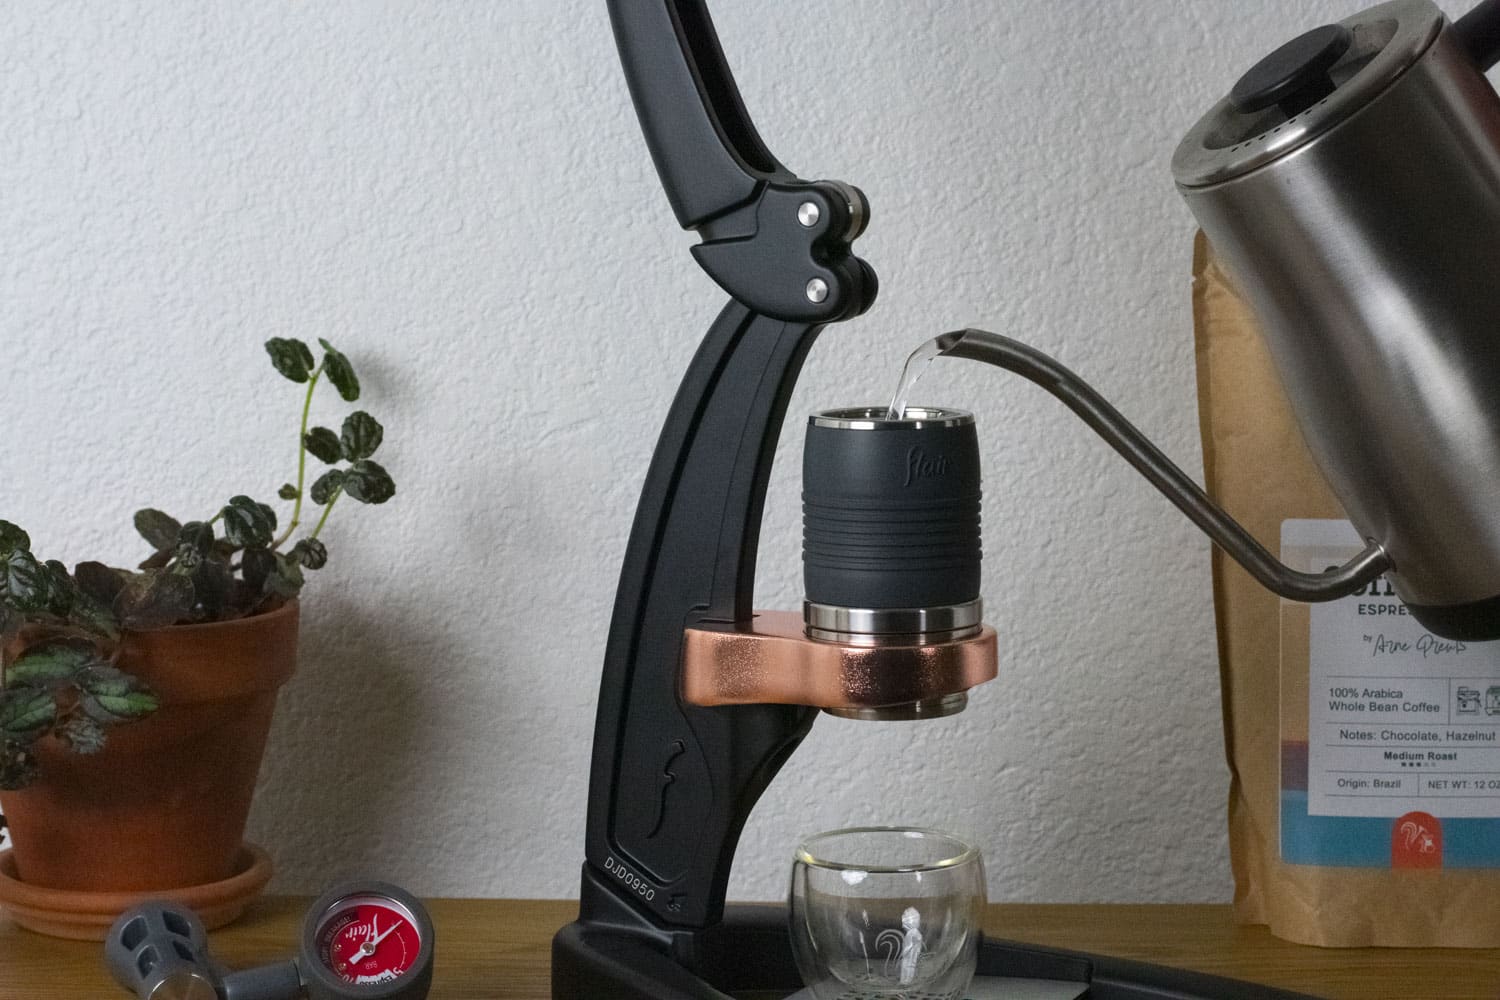
Now fit the preheated brewing cylinder onto the portafilter before pouring in hot water just off the boil. Be careful not to pour too quickly, as you want to avoid overflow.
Make sure the lever is all the way back before placing the pressure gauge piston onto the top of the brewing chamber.
Now it’s time to pull a shot. Place your coffee scale on the drip tray and tare out an espresso cup. Next, start a timer and gently pull the lever toward you to start the preinfusion stage.
After a few seconds, use more force, keeping an eye on the pressure gauge. You’re aiming to get the needle into the espresso zone, and you should see a steady flow of espresso.
I recommend starting with a 1:2 brewing ratio. So, if your dose is 15 grams, you’ll be rewarded with 30 grams of espresso in around 30-40 seconds. And if you don’t succeed at first, use the handy troubleshooting chart in the user manual to help diagnose what might have gone wrong.
How Does Espresso From the Flair Pro 3 Taste?

Coffeeness Medium Roast Espresso
Well-balanced with chocolate & hazelnut notes
Freshly roasted in Brooklyn
Very low acidity
If you’ve read my Comandante grinder review, you’ll know that it’s suitable for espresso preparation, but only just. Still, I wanted to see whether I could use it in conjunction with the Flair Pro 3 and still pull convincing shots of espresso.
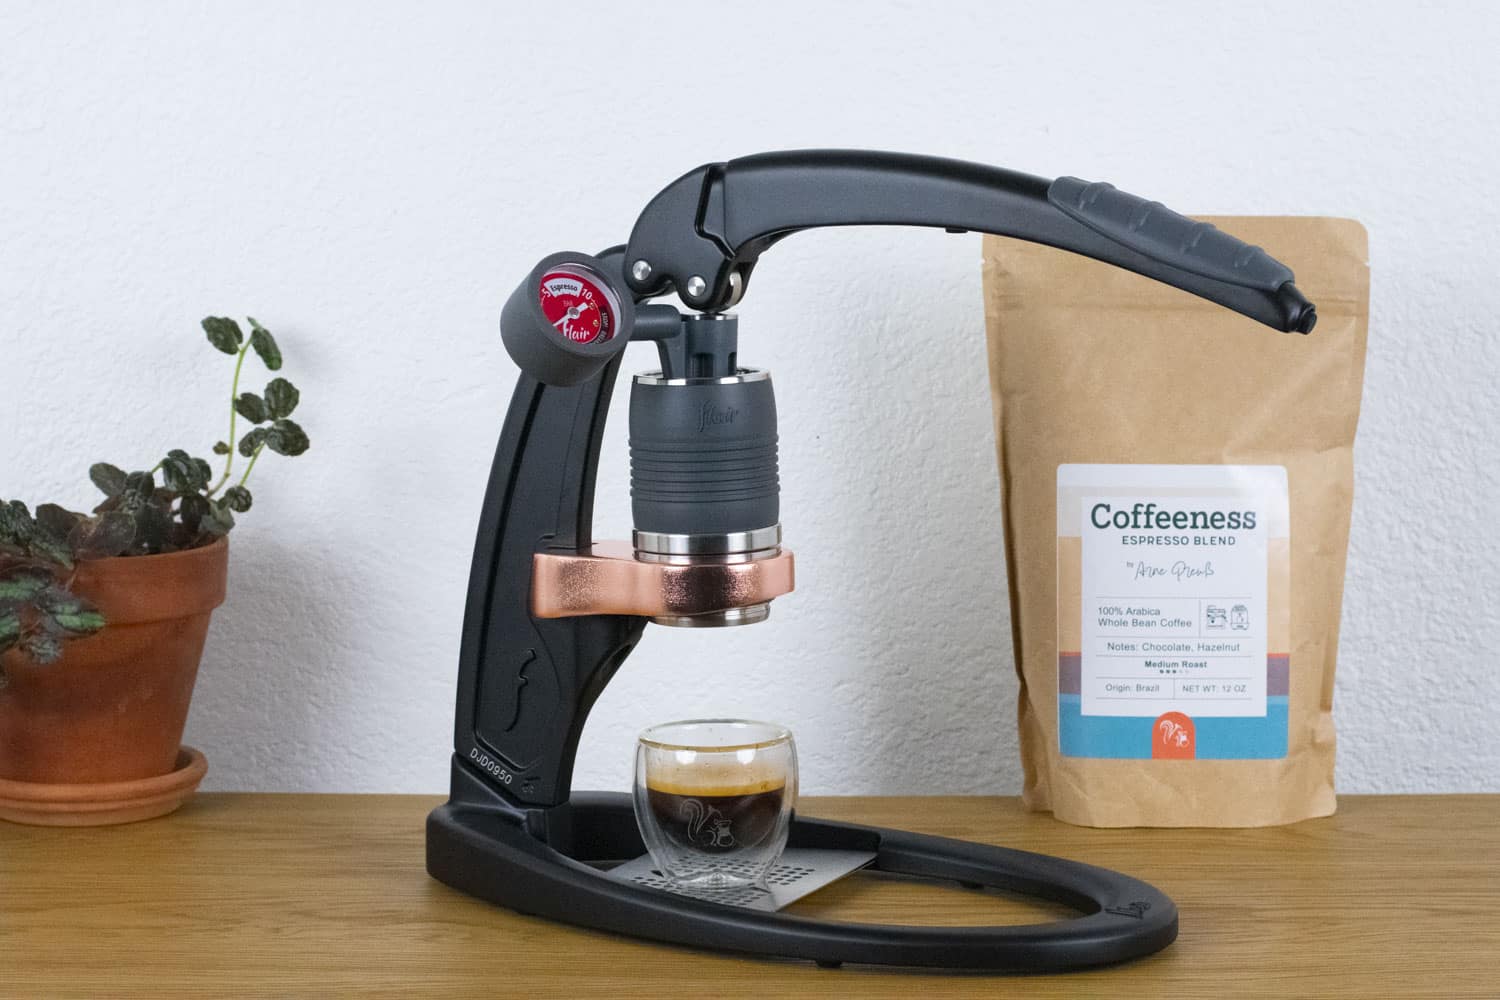
As it turns out, setting the Comandante to 11 clicks from zero and using a dose of 15 grams of coffee was the magic ticket. Sure, it took a couple of tries to get my technique down, but I was quickly pulling delicious shots of espresso. I found that a pre-infusion time of around five seconds was ideal, after which I cranked on the lever to get to a consistent 9 bars of pressure.
I was rewarded with a 29-gram shot of espresso, with an extraction time of 34 seconds. And I have to say that the Flair Pro 3 did a wonderful job of highlighting my Coffeeness Signature Espresso Roast’s luxurious chocolate and hazelnut notes. What’s more, I was impressed by the espresso’s rich crema and sparkling brightness.
How Do I Clean the Flair Pro 3?
You guys are going to love this section of my Flair Pro 3 review, seeing as there’s very little to discuss when it comes to cleaning. For starters, you can forget about descaling – it isn’t something you’ll have to worry about. With that said, may I remind you to always use fresh, filtered water to make espresso.
Of course, there is some cleanup required after pulling a shot, but it’ll only take a few seconds. The most important thing to remember is to fully empty the brewing cylinder after each shot, which just means putting a container under the portafilter and pressing down the lever until nothing comes out. That way, your used puck will be dry and it’ll be easy to knock it out before rinsing the portafilter and puck screen.
Other than that, you’ll just need to empty the drip tray and rinse it under running water. And that’s all folks!
Flair Pro 3 vs Other Flair Espresso Makers
I’ve mentioned the original Flair Classic a few times already during this review. Still, I figured it’d be a good idea to take a closer look at how the Flair Pro 3 measures up in comparison to a couple of its siblings.
Flair Pro 3 vs Classic

The original Flair Classic Espresso Maker retails for $194.00, which is quite a bit less than what you’ll pay for the Pro 3. And while the Classic is a great manual espresso maker, I have to say the Pro 3 represents a big step up in quality and performance.
Sure, I already knew what I was doing when I was testing the Flair Pro 3, but it felt a lot easier to use and proved to be more versatile. That’s all down to its increased capacity, as well as the fact that all the parts feel more burly and well-conceived. You can get wonderful espresso from either machine, but I’d say there’s a lot more room for experimentation with the Pro 3.
See Also: Flair Espresso Maker Review
Flair Pro 3 vs 58

I haven’t yet had a chance to put the Flair 58 through its paces in the Coffeeness kitchen. However, I’m well aware that this is one of the very best manual espresso machines on the market.
For starters, the Flair 58 is equipped with an actual 58mm portafilter with a wooden handle. Plus, its manual lever is absolutely huge and has a paddle at the end, giving you the maximum amount of control over how much pressure you’re exerting. Finally, the Flair 58 comes with a super cool electric heater for the brew chamber, which is only going to improve your workflow.
Costing $580.00, the Flair 58 is an expensive piece of kit. But compared to semi-automatic espresso machines, it still represents very good value for the money.
See Also: Flair 58 Review
Flair Pro 3 vs Others Comparison Chart
| Flair Pro 3 | Flair Classic Espresso Maker | Flair 58 Manual Espresso Machine | |
| Manufacturer | Flair Espresso | Flair Espresso | Flair Espresso |
| Model number | PRO 3 | Classic | Flair 58 |
| Product category | Manual espresso machine | Manual espresso machine | Manual espresso machine |
| Housing material | Stainless steel | Stainless steel with plastic parts | Aluminum |
| Color options | Black, White | Black | Black |
| Milk frother | None | None | None |
| User interface | None | None | None |
| App | |||
| User profiles | Memo function only | Memo function only | Memo function only |
| Portafilter size | 46 mm | 40 mm | 58 mm |
| Tamping | Manual | Manual | Manual |
| Removable water reservoir | |||
| Water reservoir capacity | N/A | N/A | 3.4 fl oz / 0.1 l |
| Number of boilers | 1 | 1 | 1 |
| Pump pressure | 9 bar | 9 bar | 10 bar |
| Maximum cup height | 5.0 in / 12.7 cm | 5.0 in / 12.7 cm | 5.0 in / 12.7 cm |
| Grinder | N/A | N/A | N/A |
| Grind adjustment levels | N/A | N/A | N/A |
| Bean hopper capacity | N/A | N/A | N/A |
| Specialty drinks | 1 | 0 | 1 |
| Pre-infusion | |||
| Adjustable coffee temperature | |||
| Adjustable milk foam temperature | |||
| 2-cup function | No | No | No |
| Hot water function | |||
| Hot milk function | |||
| Milk foam only option | |||
| Water filter | |||
| Power consumption | N/A | N/A | 96 W |
| Weight | 7.0 lb / 3.2 kg | 5.0 lb / 2.3 kg | 12.0 lb / 5.4 kg |
| Dimensions | 10.0 x 6.3 x 12.5 in | 10.0 x 6.0 x 12.0 in | 11.0 x 7.5 x 13.5 in |
| Warranty | 5 years | 5 years | 5 years |
| Notes | Included Accessories: User manual, pressure gauge, dosing cup, dosing collar, portafilter spout, dispersion screen, metal tamper, carrying case | Included Accessories: User manual, Bottomless portafilter, Dosing cup/tamper, Carrying case. Optional Upgrades: Pressure kit with gauge and stainless steel tamper. | Included Accessories: User manual, 1 x filter basket, detachable preheat controller, tamper, puck screen, drip tray |
Verdict: Flair Pro 3 Review
Better than the original
Flair Pro 3
A fantastic manual espresso maker
Makes superb espresso
Great fun to use
Shot mirror and pressure gauge included
Lightweight and portable
Steep learning curve
| Flair Pro 3 | |
| Manufacturer | Flair Espresso |
|---|---|
| Model number | PRO 3 |
| Product category | Manual espresso machine |
| Housing material | Stainless steel |
| Color options | Black, White |
| Milk frother | None |
| User interface | None |
| App | |
| User profiles | Memo function only |
| Portafilter size | 46 mm |
| Tamping | Manual |
| Removable water reservoir | |
| Water reservoir capacity | N/A |
| Number of boilers | 1 |
| Pump pressure | 9 bar |
| Maximum cup height | 5.0 in / 12.7 cm |
| Grinder | N/A |
| Grind adjustment levels | N/A |
| Bean hopper capacity | N/A |
| Specialty drinks | 1 |
| Pre-infusion | |
| Adjustable coffee temperature | |
| Adjustable milk foam temperature | |
| 2-cup function | No |
| Hot water function | |
| Hot milk function | |
| Milk foam only option | |
| Water filter | |
| Power consumption | N/A |
| Weight | 7.0 lb / 3.2 kg |
| Dimensions | 10.0 x 6.3 x 12.5 in |
| Warranty | 5 years |
| Notes | Included Accessories: User manual, pressure gauge, dosing cup, dosing collar, portafilter spout, dispersion screen, metal tamper, carrying case |
| Current price on Amazon | $325.00 |
| All specifications | |
Having reached the end of this Flair Pro 3 review, I can only congratulate the manufacturer on the improvements it has made. I experienced none of the frustration I felt during my review of its predecessor, and was quickly able to get into the groove.
I particularly appreciate the fact that Flair has added thoughtful touches like the rubber lever grip and heavier base. Seriously, little things like that can make all the difference. Of course, the Flair Pro 3 isn’t perfect. I mean, the whole “no heat brewing chamber” claim is a load of hogwash. But I can forgive Flair on that count seeing as preheating the thing is a piece of cake.
Ultimately, this is a fantastic manual lever machine that allows you complete control over your espresso extractions. Trust me, if you want to impress your friends with your barista skills, this is the way to do it!
I hope you’ve enjoyed my Flair Pro 3 review. What’s your favorite manual lever machine? Share your thoughts with the Coffeeness community in the comments section!
Flair Pro 3 Manual Espresso Maker FAQ
The Flair Pro 3 features a 46mm portafilter, improved brewing cylinder and an integrated pressure gauge, making it ideal for producing exceptional shots of espresso.
To use the Flair Pro 3, you’ll need a burr coffee grinder that’s capable of producing the correct grind size for espresso.
Thanks to its versatility and performance, you can use any kind of coffee with the Flair Pro 3. With that said, you’ll get the best results by using high-quality coffee beans with a medium-light roast profile.
The Flair Pro 3 is extremely easy to clean, seeing as you’ll only need to rinse the portafilter and puck screen after each use.