

I’ve been meaning to write a Hario Switch review for ages. I’ve heard a lot of good things about this so-called “hybrid brewer,” and so I’ve taken the plunge and ordered one to test out.
Regular Coffeeness readers will know how much I love manual brewing, and the Hario V60 is one of my favorite pour-over drippers of all time. So, I’m very excited to play around with the Hario Switch and unlock its potential.
While I’m waiting for the Amazon box to arrive, I’ve decided to go ahead and conduct a first-look Hario Switch review. And once I’ve had a chance to use the thing, I’ll add my first-hand experiences.
So, without further ado, let’s see what this unique brewer is all about.
A wonderful hybrid brewer
Hario Switch V60 Immersion Coffee Dripper
Gives the Clever Dripper a run for its money
Great value
Intelligent design
Easy to use
Extremely versatile
Durability concerns
| Hario Switch V60 Immersion Coffee Dripper | |
| Current price on Amazon | $37.58 |
|---|---|
| All specifications | |
Table of Contents
What Is the Hario Switch Immersion Dripper?
Originally released in 2019, the Hario Switch V60 Immersion Coffee Dripper was intended as a direct competitor to the hugely popular Clever Dripper. I’ll go into more detail about how these two measure up a little later. However, at this point I can say that the Hario Switch offers more versatility than its rival.
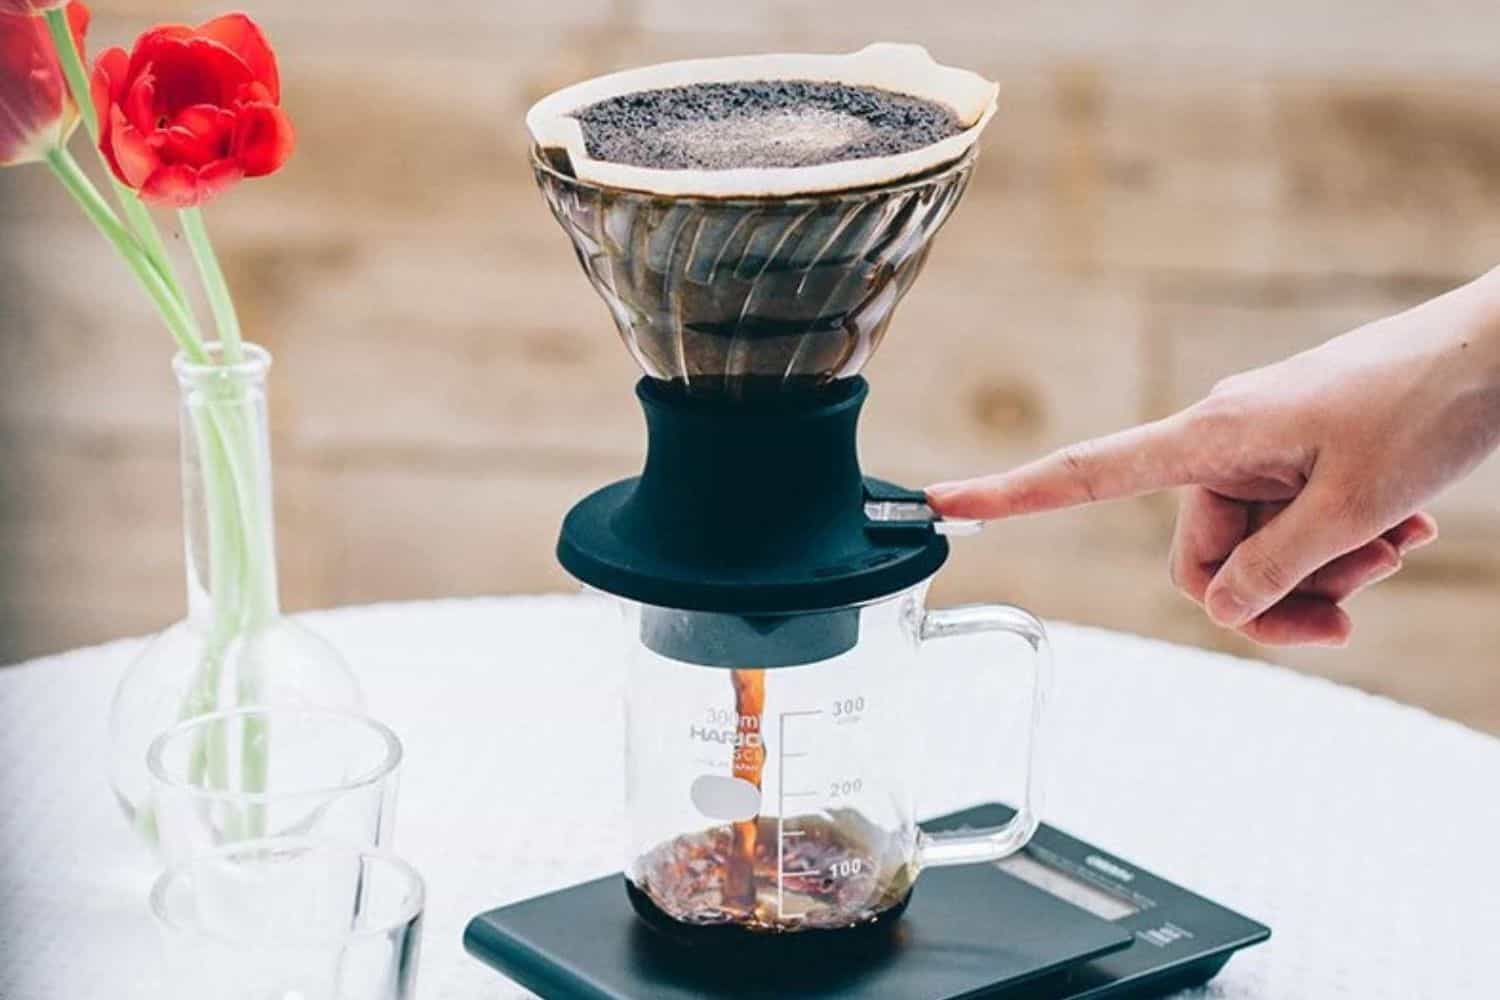
Costing $37.58, the Hario Switch is essentially the brand’s classic V60 dripper mounted on a base. Still, there’s more to the story than that. Designed as a dual-purpose brewer, the Switch features a very clever trick. You can control water flow by using a switch on the side of the silicone base to manipulate a stainless steel ball valve. This way, the Hario Switch can be used as either an immersion brewer or a traditional pour-over dripper.
In case you were wondering, immersion brewing is what happens in a French press. So, ground coffee sits in hot water for a while before being filtered. With a French press, there’s a mesh filter, whereas here, there’s a paper filter.
Speaking of, the Hario Switch uses cone-shaped filters, which are cheap and easy to get hold of. With that said, I do recommend buying Hario filters, seeing as some knockoff brands don’t deliver the same quality.
Hario Switch Design and Materials
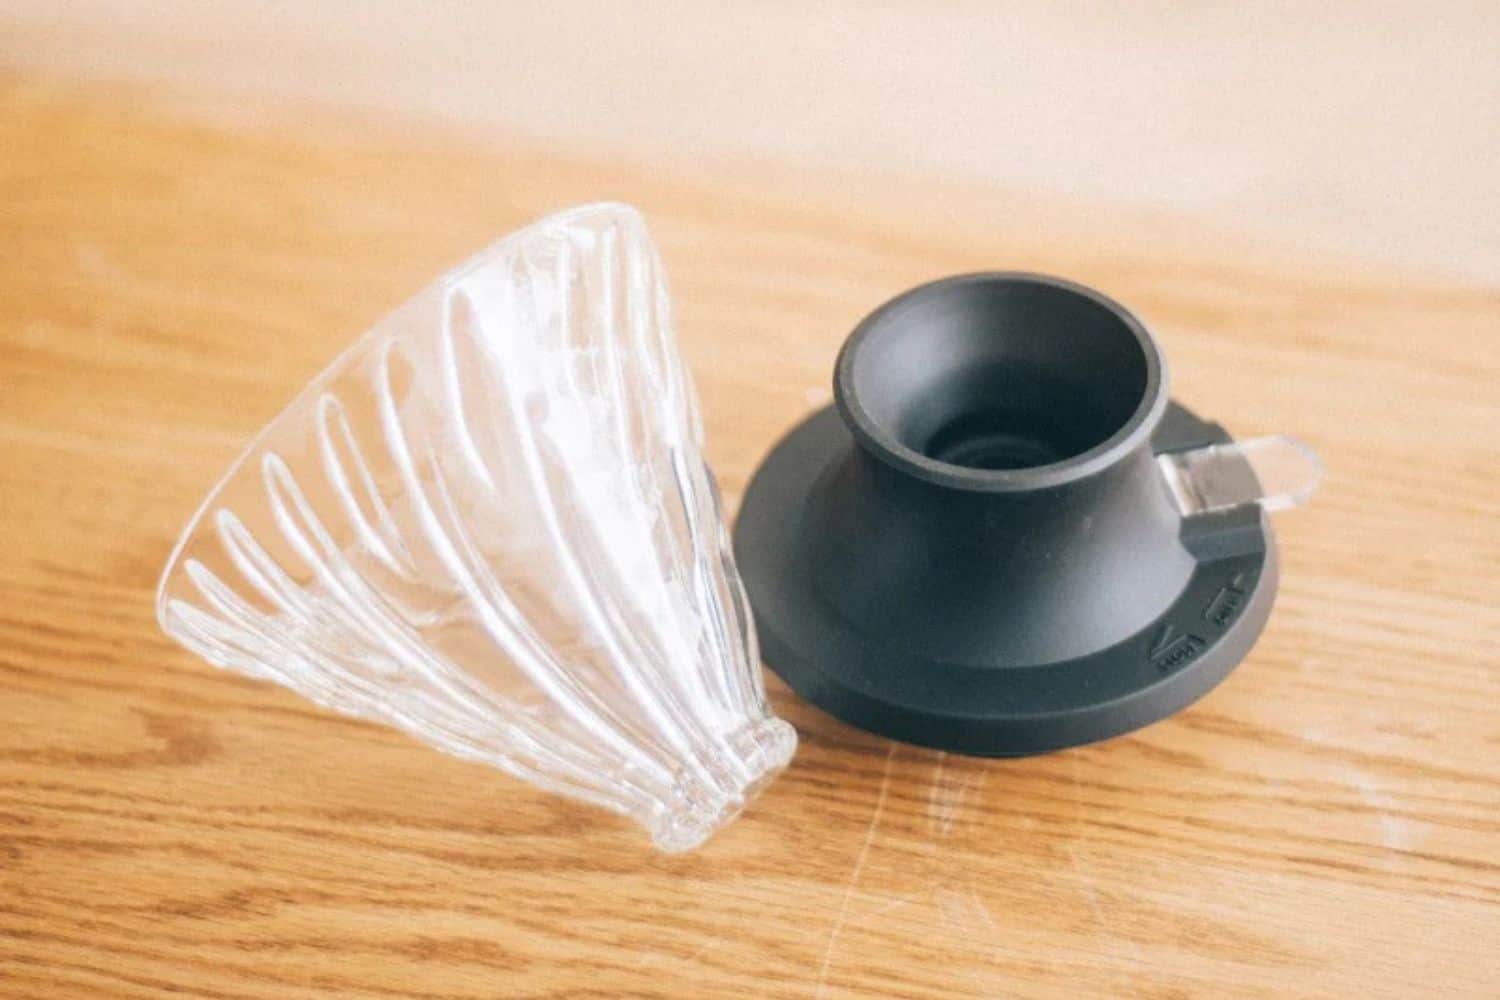
As I already mentioned, the Switch features Hario’s enduring V60 dripper mounted on top of a black silicone base. Located on the side of the base, a plastic switch controls a stainless steel ball valve, which can be set to block the flow of water completely.
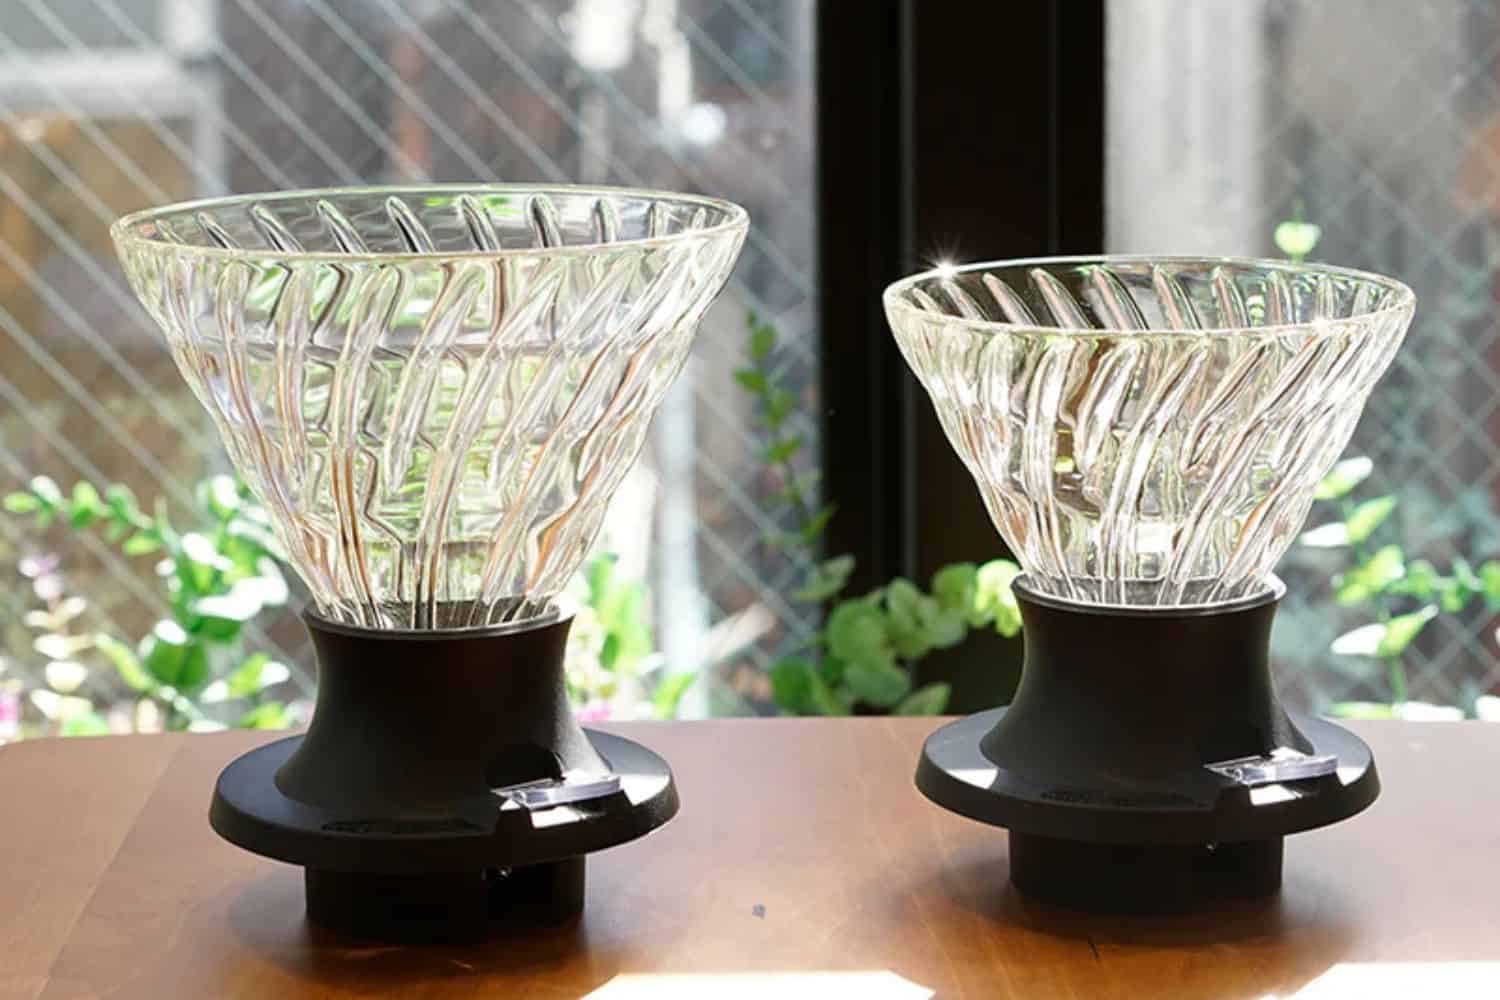
In terms of materials, the dripper itself is made from Hario’s signature heatproof glass, and features a ribbed design on the inside. Elsewhere, the silicone base appears to be pretty sturdy, although the plastic switch looks a little flimsy.
Personally, I’ve long admired the V60’s sleek, iconic design, and I know I’m not alone. However, taken as a whole, the Switch looks a little clunky, seeing as the base detracts from the dripper’s timeless silhouette.
Incidentally, the Hario Switch is available in two sizes – 02 and 03, although the classic 02 size is the most popular option. This model has an 8.5-ounce (250 milliliter) capacity, which is ideal for single servings of coffee.
Are There Any Durability Concerns?
Seeing as I haven’t yet put the Hario Switch through its paces, I can’t tell you how durable the thing feels. With that said, I am a little concerned about the durability of the plastic switch and steel ball valve. Then again, I haven’t heard any reports of these components failing over time, so maybe there’s nothing to worry about.
Of course, any time you have a glass component like the Switch dripper, there’s the chance it’ll break. Still, as long as you don’t drop the thing on a hard surface, all will be well.
By the way, the Hario Switch comes apart and can be put in the dishwasher. However, if you’re worried about durability, I’d recommend washing the thing by hand instead.
What Brewing Techniques Does the Hario Switch Unlock?
The great thing about the Hario Switch is that it offers the best of both worlds. You can use the thing as an immersion brewer or as a classic percolation device.
The former option is ideal for beginners, seeing as you don’t have to worry about grind size, flow rate and pouring technique. After all, immersion brewing is very forgiving, and cup results will be more full-bodied with toned-down acidity.
As for the latter option, there’s a reason why the Hario V60 is so beloved by coffee geeks the world over. This elegant brewer is capable of producing clean, sweet and complex coffee as long as you’re willing to put in the time and effort to perfect your technique.
Of course, what gets a lot of folks pumped is the Switch’s hybrid capabilities. Seriously, you can really disappear down a rabbit hole with this thing by designing recipes that combine immersion and percolation in carefully timed sequences.
What Gear Do You Need to Get the Most Out of the Hario Switch?
If you’re new to the world of manual brewing and don’t own a load of fancy coffee gear, the Hario Switch is a good place to start. That’s because using it as an immersion brewer doesn’t require the levels of precision necessary for pour over. With that said, you will need a good burr coffee grinder.
On the other hand, if you want to maximize the versatility of the Hario Switch, you’re gonna need a more serious setup. For starters, you’ll need a coffee grinder that can produce very consistent results. Check out my guide to the best manual coffee grinders for the most cost-effective options.
What’s more, you should get hold of the best coffee scale you can lay your hands on, as well as a quality gooseneck kettle. After all, precision is key to achieving truly exceptional results.
Brewing With the Hario Switch: A Step-by-Step Starter Guide
I’m not about to give you an in-depth tutorial on how to hone your pour-over method. Still, if you’re interested, check out my big pour-over coffee preparation guide. For the purposes of this Hario Switch review, I’ll focus on immersion brewing and how to get started.
As it happens, this is a great way to begin learning the pour-over ropes, and you’ll gain valuable insights on how dose, grind size and other variables come into play. Besides, seeing as immersion brewing is so easy, you’ll be rewarded with great coffee every time.
Here’s a basic recipe:
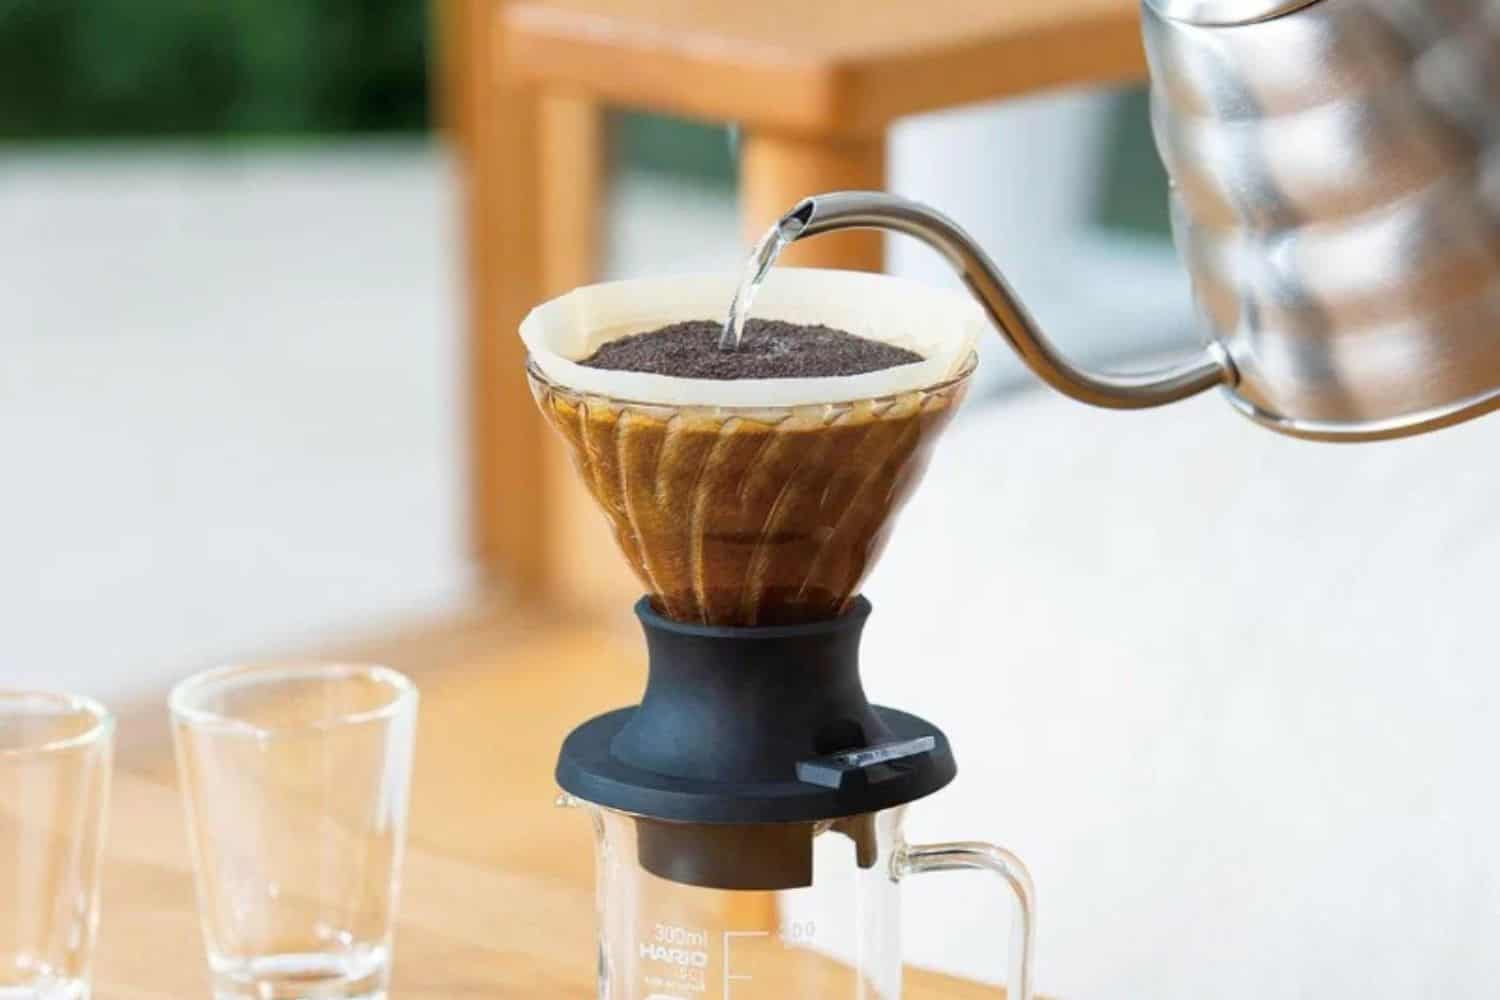
Start by boiling water, then grind 15 grams of coffee. I recommend using a medium grind size.
Add a paper filter to the Hario Switch and place it on a coffee cup. With the valve open, rinse the filter, then discard the water.
Place the cup and Switch on your scale, before adding the ground coffee and pressing tare. Make sure the valve is closed.
Start a timer, then slowly pour 40 grams of water over the bed of ground coffee. Allow this to bloom for around 30 seconds.
Now add water until the scale registers 250 grams and let the coffee steep.
When the timer hits the two-minute mark, gently stir the coffee then press the switch to open the valve.
The coffee will flow into your cup, and once it’s all in, flip the switch back up.
Advanced Recipes to Explore
If you’re interested in pushing your Hario Switch to the limit, you can find plenty of so-called “Switch hacks” online. These often involve using a different filter cone on the Switch base, although I’m not sure how well that would work.
As for advanced recipes, the most famous comes from Brewer’s Cup champion Tetsu Kasuya. His Devil Switch Technique recipe is pretty complicated, and requires a series of pouring phases as well as some steeping. Apparently, this recipe works really well for single origin coffee beans.
Personally, I’d recommend starting with a simple recipe that involves both pour-over and immersion. So, you could amend the recipe above so that the valve is open for the first minute, then closed for the second. And once you’ve nailed that recipe, feel free to experiment to your heart’s content!
Hario Switch vs Clever Dripper: Which Immersion Brewer Is Best?

As I mentioned earlier, the Clever Dripper is a very popular manual coffee maker that’s similar to the Hario Switch.
Featuring a conical design and an innovative valve release system, the Clever Dripper uses the immersion method. You simply steep the coffee then place the Clever Dripper on a cup or carafe to release the valve.
While the Clever Dripper is very convenient, it doesn’t offer the same functionality as the Switch. In other words, you don’t have the option to use the Clever Dripper as a basic pour-over device.
Then again, for those who aren’t interested in developing recipes, the Clever Dripper could be ideal. Plus, at $36.95, it represents an affordable way to prepare delicious coffee with very little effort.
See Also: Best Pour-Over Coffee Maker
Final Verdict: Is the Hario Switch the Brewer for You?
A wonderful hybrid brewer
Hario Switch V60 Immersion Coffee Dripper
Gives the Clever Dripper a run for its money
Great value
Intelligent design
Easy to use
Extremely versatile
Durability concerns
| Hario Switch V60 Immersion Coffee Dripper | |
| Current price on Amazon | $37.58 |
|---|---|
| All specifications | |
Now that I’ve reached the end of this initial Hario Switch review, I can say that the Japanese manufacturer appears to have hit a real home run. While the Clever Dripper is limited by its valve release system, the Hario Switch opens up a world of possibilities. What’s more, it appeals to both novice brewers and world champion coffee nerds.
I can’t wait to geek out with the Switch and develop my own recipe. And as I said earlier, I’ll update this review with my test results and first hand experience as soon as I can.
Do you own the Hario Switch? Got any recipes you’d like to share with the Coffeeness community? Feel free to leave a comment!
Hario Switch Review FAQ
The Hario Switch is kind of like a more versatile V60, in that it also offers an immersion brewing option.
Using the Hario Switch means you have more brewing options. Plus, you’re able to develop recipes that utilize both immersion and percolation.
The Hario Switch is fairly durable in that it features a heatproof glass cone and a silicone base. However, the plastic switch is a potential weak point.