



Sit around doing nothing and waste away on the couch? That’s never been our style. The Coffeeness team spends much of the year traveling. And as you might imagine, that means we’re seasoned pros when it comes to making coffee on the go. We always bring good coffee with us and insist on brewing it properly – even in the jungles of Thailand.
After a lot of trial and error and a few setbacks, I now consider myself a true outdoor coffee expert. In this guide, I’ll examine the equipment and preparation methods that’ll serve you best when you’re out camping, glamping or cruising in an RV.
Table of Contents
The Packing List: What Do Discerning Coffee Lovers Need to Bring?
No matter which brewing method you end up choosing – if coffee is important to you when you’re traveling, there’s some basic gear you should always bring along. After all, the basic principle of brewing remains the same across all methods:
First, we need a way to turn cold water into hot water, preferably without using electricity.
Second, we need a device that extracts the flavor from the ground coffee – either directly or through a filter.
Third, we need a cup and/or a thermos so we don’t have to drink from a shared pot. Which would be completely uncivilized.
Since we shouldn’t forget where you’re reading this guide, there’s a fourth condition:
Pack some fresh, high-quality whole coffee beans!

It’s true that a bag of ground coffee is easier to transport. And with pre-ground beans, you don’t need a coffee grinder.
But if you take things seriously enough to think about the right method for making coffee on the go, you shouldn’t stop at the most important requirement for good coffee, right? So, to sum it up in a packing list, here are the things you should never forget:
Gas stove plus replacement cartridge
Matches and/or lighter
Coffee maker of your choice
Stainless steel cup or insulated travel coffee mug
Coffee beans
Manual coffee grinder
Making Coffee on the Go: What’s the Best Brewing Method?
There are people who cram half their household belongings into their car before heading out into the “wild” for a few days. Still, aside from full-time campers, I’ve never met anyone who took their fully automatic espresso machine with them on vacation.
Being on the go means rolling up your sleeves – literally. The pour-over dripper is my favorite method for making coffee when I’m camping because it’s simple and delivers great results. But there are other great brewing methods too, each with a list of pros and cons.
Pour-Over Dripper

A Pour-over dripper takes up next to no space, especially something like the foldable MiiR Pourigami. If you opt for a Hario V60 or Kalita Wave, I’d recommend going with a metal version rather than (breakable) porcelain.
Paper filters may not weigh anything, but they still create trash – something you should generally avoid leaving in nature. A reusable cloth or mesh filter is the better choice for outdoor coffee.
Once you get the hang of making coffee by hand with a dripper, you can really get the most out of your coffee beans. Plus, even the best pour-over coffee makers are generally very affordable.
PROS
- Small and lightweight
- Makes great coffee
- Easy to use
- Easy to clean
CONS
- Paper filters create trash
- Only for single portions, not the whole jug
French Press
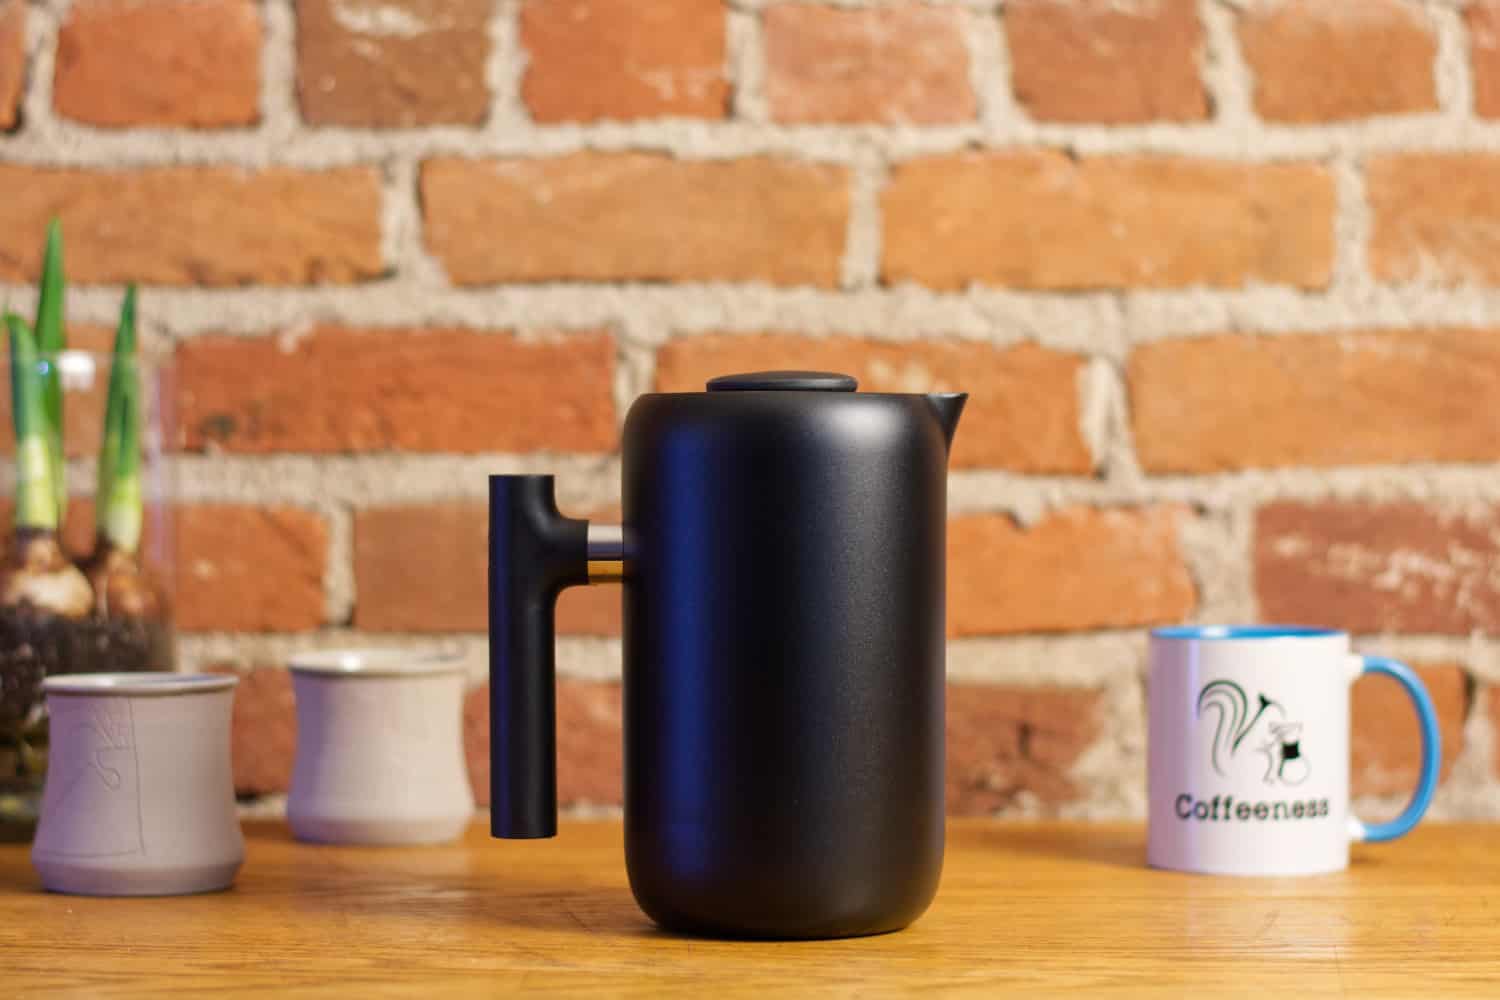
It’s more than a little risky to go hiking in the backcountry with a glass Bodum French press. A much better option would be a stainless steel model, even though it’s going to be heavier. For example, my beloved 24-ounce (710-milliliter) capacity Fellow Clara weighs a whopping 2 pounds (917 grams).
On the other hand, a French press doesn’t require filters, and the instructions for brewing and cleaning are practically foolproof. Even if you get the water temperature, dose or grind size (slightly) wrong, the full-immersion coffee usually still tastes good. It also packs enough caffeine to sustain you on a day hike.
PROS
- No filters
- Good for large servings
- Stainless steel models are practically unbreakable
- Forgiving and easy to use
CONS
- Even small models take up a lot of space
- Cleaning can be fiddly
Moka Pot

Regular Coffeeness readers will know that the humble moka pot is one of my favorite brewing methods. If all you need in the morning is a small hit that comes pretty close to espresso, a compact Bialetti or something similar will serve you just fine.
The moka pot is even simpler and more forgiving than the French press:
Add finely ground coffee to the funnel.
Fill the lower chamber with cold water to just below the valve.
Screw the lid on then place the moka pot on the stove.
Remove it as soon as you hear a bubbling sound.
There’s no risk of a mess or broken glass here. However, if you let the water come to an uncontrollable boil in your Bialetti, the coffee can quickly burn. When this happens, you’re left with a rather strange drink that you can’t even enjoy with sugar. Oh, and the pot gets hot. Very hot.
PROS
- Very compact and rugged design
- No filter
- Full-bodied, espresso-like coffee
- Easy to use
CONS
- A gas stove or fire pit is always required
- Pot takes a long time to cool
AeroPress
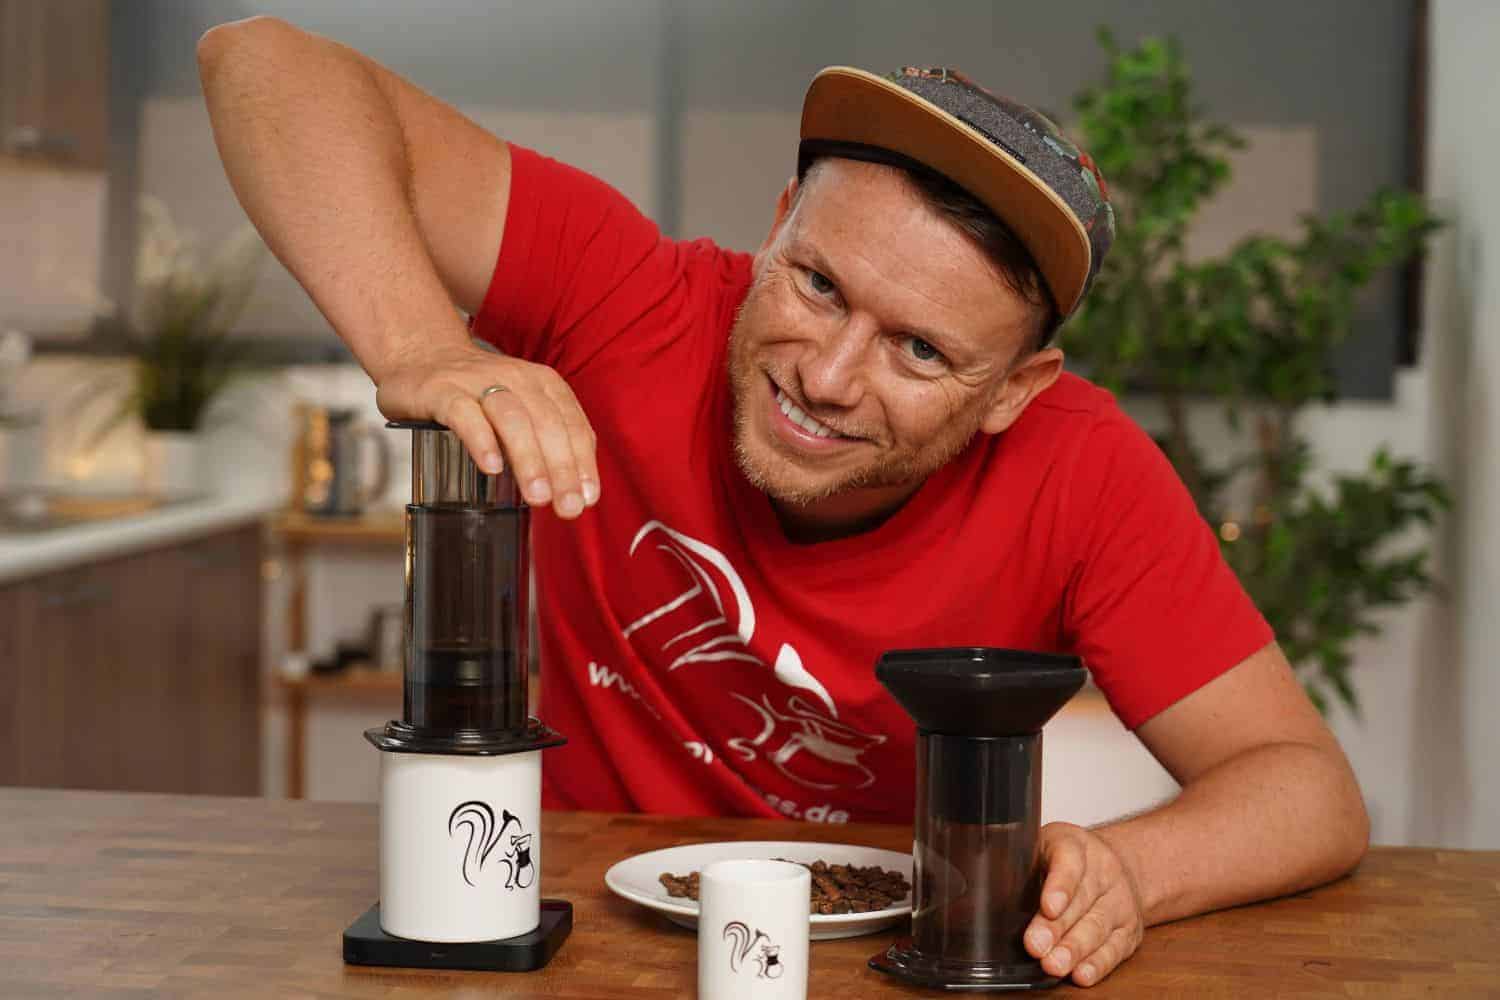
The AeroPress is a super-popular alternative to the stovetop espresso maker. The combination of full-immersion brewing and pressure produces complex and exciting cup results. Plus, you can freely experiment with this approachable manual brewing method.
It’s true that you’ll need more accessories here than with other methods. However, the system is made of lightweight plastic and won’t take up much space in your backpack.
I absolutely love using my AeroPress. Still, let’s be honest and admit that, first of all, you need special coffee filters, and second, you go through quite a bit of trouble just to get one cup of coffee.
PROS
- Very popular way to make coffee on the go
- Fits onto a mug or cup
- Makes great-tasting coffee
CONS
- Slightly more complicated than other brew methods
- Requires a special filter
Manual Espresso Maker
If you can’t imagine a morning without espresso, you can still enjoy a strong, black mini-sip even while traveling. The market is full of portable espresso machines that look kind of like a folded umbrella.
You put fresh, finely ground coffee into the “machine” and then use a pump mechanism to create pressure that forces the water through the coffee grounds. I have to say my personal favorite is the WACACO Nanopresso, which actually produces very good results. Plus, it costs just $79.90, which is quite reasonable in my opinion.
Another option comes in the form of the Flair Go Espresso Maker, which can produce authentic espresso. This high-quality machine folds up and fits in its own sturdy travel case along with its accessories. Of course, you’ll need a very good manual coffee grinder, and plenty of patience. But if you’re truly dedicated to espresso preparation, this is the best manual espresso machine for traveling.
Coffee bags
A few years ago when I wrote my article on geisha coffee, I came across pre-portioned coffee bags for the first time. They work exactly like tea bags:
The ground coffee comes in a single-serve packet that you attach to a cardboard holder in the cup, and then you can brew it almost like a manual filter. Let it steep, remove the holder and just like that, you can enjoy even super-expensive specialty coffee out in the wilderness!
That may be true, but every single serving creates waste – and plenty of it. In addition to the sachet, you also have to dispose of the aroma-sealing outer packaging. All in all, the idea is more of a convenience gimmick that now seems somewhat outdated.
Cowboy Coffee & Other Methods

We coffee-crazy supercampers may turn our noses up at any brewing method that doesn’t require any special equipment. Like when we just mix ground coffee and hot water coffee right there in the pot and wait for the grounds to settle to the bottom on their own.
But if you think about it, the method we know as Turkish coffee, cowboy coffee or whatever else is simply a full-immersion variation that isn’t filtered.
Here, the brewing time is just as unimportant as the dose or the correct grind size. A finer grind will make your coffee stronger, while a coarser grind won’t. To find your ideal brew ratio, you’ll have to experiment a lot.
As long as the beans are fresh and you’ve ground them just before brewing, I see nothing wrong with this method. If you want a budget-friendly grinder to make cowboy coffee, the Hario Mini Slim Plus will do the trick. Oh, and you can avoid getting coffee grounds stuck between your teeth by stirring thoroughly right after brewing.
Medium roast coffee blends with notes of chocolate and spice work infinitely better than a fruity and floral single origin coffee. That’ll just end up tasting sour.
The Best Motorhome Coffee Maker: Coffee Equipment for Traveling in Style
If you swap your tent for a campervan, RV or trailer, it’ll be tempting to pack more coffee-making luxuries. A full-size automatic coffee maker might be overkill. An espresso machine with all the bells and whistles probably would be, too.
I rarely stay in a camper when I’m on the road, but it almost goes without saying that you don’t have to make your coffee in a dented kettle on a portable camping stove.

Drip coffee from a machine works pretty well in a camper. However, it’s not that easy to choose the right model for this setting. Even though you have more space than in a backpack, the kitchen area is still limited. Plus, you have to factor in energy consumption, especially if you’re using solar power.
Besides, there’s no reason to make things overly complicated or complex – especially since high-quality machines are becoming increasingly complicated and, as a result, more delicate.
With that in mind, I’d take a look at the lower price range and go with a compact and well-designed machine like the Cuisinart DCC-5570. For under $70, you’ll get a lightweight and sturdy coffee maker with a stainless steel thermal carafe.
The insulated carafe not only keeps you from having to deal with broken glass, it’ll keep your coffee nice and hot if you want to place it on a camping table outside your RV.
It might seem a little over the top to bring your own coffee gear to fully equipped hotels or vacation rentals. But you can never be sure that they’re really fully equipped. Or clean.
That’s why I always have my pour-over coffee gear and my Comandante coffee grinder with me. And good coffee beans, of course.
Making Coffee on the Go: My Tips for Doing It Right
If you’re going to go to the trouble of lugging everything you need for brewing along on your trip, you should figure out beforehand how to get the best results. Otherwise, what’s the point of all that effort?
It’s true that the basic principles of these preparation methods don’t change just because you’re wandering around in the woods. But nature sometimes has other plans, and you need to be prepared for many things that you’re unlikely to encounter at home.
Learn How to Pack Smart
While this is a general tip for all new outdoor adventurers, it’s particularly relevant to your coffee gear: there’s always a piece of glass somewhere – in my case, it’s my Comandante grinder’s collection jar. What’s more, there’s always one piece of gear that takes up a lot of space – for example, a dripper that can’t be folded up.
When you’re packing your backpack, you should arrange coffee gear in a way that’s as shatter-proof and reasonably hygienic as possible. Tricks like “stuffing socks into empty spaces” are clever, sure, but I still don’t want them in my cup.
It’s worth getting a well-padded case that can hold your hand grinder, filters, AeroPress and whatever else you need. Then all you have to do is take it out and you can get started right away, without having to dust off all your gear first or worry about broken pieces.
Test the Water
Most coffee brewing methods demand water temperatures between 194 and 205 degrees Fahrenheit (90 and 96 degrees Celsius). Pour over and French press fall in the upper range, while 194 degrees Fahrenheit is ideal for the AeroPress. But how do you estimate that?
Generally speaking, it’s clear that bubbling, steaming water fresh off the gas stove is close to the 212-degrees Fahrenheit (100-degrees Celsius) mark. And as soon as you take the lid off the pot or kettle, the water quickly cools. That’s obvious, too.
To ensure that, when traveling, you end up with water that’s at least somewhat within the ideal temperature range for brewing, you have two options:
At home, use a stopwatch and a thermometer to see how long it takes for the pot, cup, kettle or whatever else to cool down to a certain temperature after the water has come to a boil.
Follow the formula “1 minute = 1 degree Celsius with the lid open.”
The second method depends heavily on the material of the container and the ambient temperature, so it’s a bit less precise However, it’s a viable solution if you missed the first one.
If all else fails, just go by this rule: “As long as it’s not bubbling anymore, that’s all that matters.”
Pre-Plan Grinding & Dosing
While you could get away with using the wrong water temperature, using the wrong amount of coffee and the wrong grind size will ruin everything. That’s why you should take the time before your trip to adjust your manual grinder and get a feel for how much coffee you need to use per brew.
If you don’t want to lug around a scale and/or a measuring spoon (and you don’t), you should see if one of the items of gear you’re carrying can serve as a measuring tool. A cup is a good option, especially if it has an integrated level marker.
Keep Your Beans Dry
If you’ve checked out my article on storing coffee beans, you’ll know how important it is to store coffee in a dry, dark and temperature-stable place to preserve its flavor.
Moisture is likely to be the biggest threat on your trip, unless you leave the beans out in the sun during your layover. I think keeping them in their original packaging plus a Ziploc bag is the best idea; I feel like packing a metal coffee can would be a bit excessive.
Make Your Own Coffee Filter
If you run out of paper filters, it can be hard to know what to do at first. In theory, any fabric that isn’t too coarse, is clean and is somewhat absorbent can be used as a filter. Cotton is a good option.
Since you should always have an extra pair of clean socks with you as a camper and hiker, they can also serve as coffee filters in a pinch. However, the fabric must be lint-free, smooth, not too thick and preferably wool-free.
A T-shirt or something similar will work, too. If that’s too gross for you, consider packing a clean cotton handkerchief. It weighs nothing, takes up no space, can be used for other things and is wonderfully old-school.
With all that said, you can save yourself the hassle by replacing paper coffee filters with a fine mesh reusable filter. While cloth filters are the lightest and most compact, mesh filters are my favorite because they’re durable, hygienic and fairly forgiving of mistakes.
Campers Don’t Drink Cappuccinos

If you want to drink coffee in the wilderness, you’ll have to learn to enjoy it black. Or do you want to go out every morning looking for a cow or a place to get oat milk?
For vacation rentals and campers, milk and (battery-powered) milk frothers are still an option. But are they really necessary?
The fact is that we’ve gotten into the habit of adding milk to our coffee because many roasts are too bitter and too dark for our taste. But there are countless bean varieties that can be enjoyed without any milk at all – and, most importantly, without any bitterness.
You’ll need to find these and learn to love them before your trip. Unless, of course, you want to spend your time figuring out how to pack a carton of milk in your backpack so that it doesn’t break or go bad along the way.
Final Thoughts: Start a New Coffee Adventure!
Of course, coffee isn’t the most important thing when you’re on the go. And my tips are just solutions to real “first-world problems.” But I enjoy doing more than just adding hot water to instant coffee, even when I’m traveling.
Fortunately, it’s really easy to make coffee on the go, and it doesn’t take much effort. You may have to make a little extra room in your backpack, but it’ll definitely be worth it. With that in mind, I wish you all happy, safe and caffeinated travels!
Tell me about your trips and your favorite way to make coffee when you’re on the go. The comments section is all yours!