

Funnily enough, I’ve rarely talked about how to froth milk here at Coffeeness. I spend most of my time discussing coffee preparation, whether from a pour-over dripper, super-automatic espresso machine or home espresso machine.
Milk foam usually tends to play second fiddle – even though I love it!
Many readers and users still frequently ask about milk foam quality when it comes to buying a machine, and yet super-automatics have less to do with perfect milk froth than you might think.
That’s because achieving the perfect milk foam depends on such a great deal more. You can find out what exactly in this revised how-to article.
I use the best tools, give you tips on how to froth milk without buying a super-automatic machine and pick up again on some of the topics from my milk frother guide.
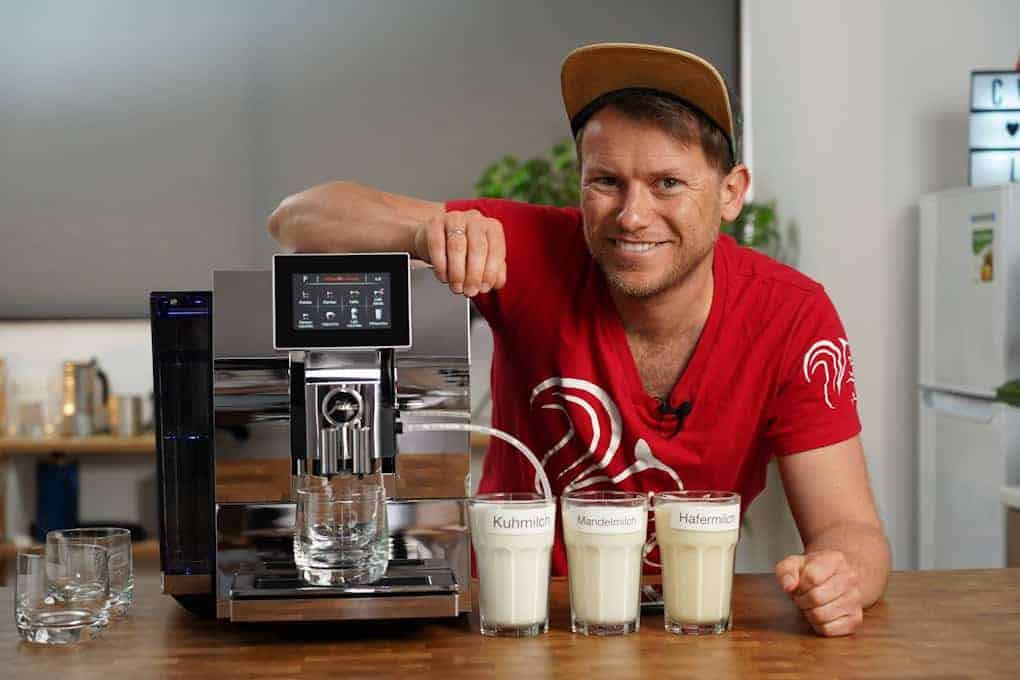
The heart of the matter, of course, is the raw material itself and the big question: which milk makes the best milk foam? The question of whether plant-based milk alternatives produce equally good foam is also becoming increasingly important.
First, the good news: you can learn how to froth milk with virtually any milk or milk alternative. All you have to do is understand what occurs as you heat milk and adjust your ingredients and tools accordingly.
Table of Contents
The Best Milk For Milk Foam: Forget the Science!
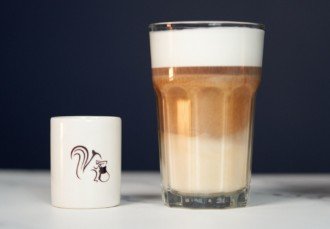
I won’t bore you to death by explaining milk foam in scientific detail. Suffice to say, the precise composition of whole milk (fat, protein, lactose and water) is what makes it the ideal choice for creamines, stability and taste.

If we navigate away from this ideal state, foaming is not impossible however. It just gets a little more difficult, or rather the foam has a slightly different consistency and stability. Not to mention taste.
I’ll now explain what this means in more detail. Still, I must point out that the same type of milk from different suppliers often has different foaming properties.
This hint was provided by a user in the comments section. Thanks for that! You’ll therefore have to spend a bit of time trying things out until you find your favorite.
Whole Milk: The Standard Classic
Full-fat whole milk produces simply superb foam. Even in the form of UHT milk, where it’s been ultra-heat treated and therefore no longer contains all its ingredients in their original form, the fat content is still its most advantageous quality.
That’s because the fat in milk is also a known flavor carrier and ensures an ultra-creamy texture. In addition, it provides your taste receptors with the ideal basis to better discern the nuances of espresso without pushing to the fore any specific flavor of its own.
But: industrial milk production is just as much a crime against nature as every other aspect of mass agriculture. Cow’s milk actually only belongs to cows and calves – people just steal it.
There’s no debating it and that’s why I love the advertising slogan “It’s like milk, but made for humans” from the plant-based milk producer Oatly.
But I shouldn’t swing the moral club around in this regard, because I like frothing milk with full fat cow juice too. That said, I do make sure to buy organic and prefer to obtain it directly from the producer.
Low-Fat and Skim Milk: The Naive Fallacy
Those of us that watch our weight are often convinced that low-fat or skim milk, at around 0.1 percent fat, is the better alternative. However, there’s now a school of thought that says fat as a macronutrient is really a good thing because it fills you up faster and for longer.
Now, consuming coffee and milk foam isn’t about becoming full. But the opposite, restricting ourselves, isn’t the point either: frothed milk and coffee are luxury foods that we treat ourselves to, not things we consume in abundance for dinner.
What’s more, because low-fat and skim milks have their fat content thrown away, they inevitably become more carbohydrate rich. Milk carbohydrates aren’t exactly the best either, because they drive blood sugar levels up fast, causing them to drop off just as quickly too.

Besides, I think that especially when enjoying coffee, we really shouldn’t worry about whether the milk is “making us fat” or not. That’s because the milk is the least of our problems.
Drinking a simple cappuccino daily, rather than a triple caramel latte mocha, really won’t impact your figure much at all.
From a foaming perspective, even milk with around 1.5 percent fat content won’t cause you any problems.
With skim milk, however, it becomes all the more difficult to achieve foam of proper structure that lasts longer than two seconds. That’s because an important building block of bubble binding is obviously missing. Its overall watery character can’t be overlooked, but it does still work.
In my opinion, a striking argument in favor of using low fat milk is the flavor. It’s definitely different from whole milk and doesn’t feel quite as noticeable in the mouth. Many coffee drinkers are looking for precisely this neutrality or don’t like their coffee being ultra-creamy.
Lactose-Free Milk: A Possibility…
Let’s recall that commercially available whole milk consists of around 5 percent lactose. Some people can’t metabolize this milk sugar.
It’s for this reason that lactose-free milk was developed, wherein the lactose is broken down into its simple sugars with the help of the lactase enzyme (beta galactosidase). In effect “digestion” already occurs during production, meaning those with lactose intolerance are able to dig in too.
Even if the song and dance about avoidable intolerances has reached completely ridiculous proportions, lactose-free milk does have one interesting advantage: it’s deliciously sweet. Just damn expensive.
Because only its lactose molecules are messed with, lactose-free milk can be foamed brilliantly. The sweetness is also a great addition to rather dark espresso roasts. Still, I do think it should remain an emergency solution for actual lactose intolerant folks.
Plant-Based Milk Alternatives: Options as Numerous as Grains of Sand on a Beach
I could go on and on about the different foaming properties of non-dairy milk options. Some even easily match the standards of actual milk.
However, these milks exhibit much greater “foaming disparity.” Soy milk, for example, is an absolute berserk foamer, whereas you can completely forget about pure rice milk.
For just as long as the hype around veganism has been going on, baristas and coffee fans have been desperately looking for a plant-based alternative that almost exactly matches the foaming properties of whole milk.
They haven’t been entirely fruitful as yet and, as we here at Coffeeness discovered back at the Berlin Coffee Festival 2018, the extremely hyped Oatly Barista Edition doesn’t fulfill this promise either.
The thing is that the usual three oat milk ingredients (water, oats and salt) become a list of ten individual items in the Barista Edition. Oil and acidity regulators are used, as fat alone doesn’t help produce a milk capable of better frothing.
We can see this with the previously mentioned foaming queen, soy milk, too. It actually contains more than 30 percent protein, which is why soy milk foams like mad and quickly takes on a very strange structure. At the same time, the disequilibrium makes the foam collapse faster. Soy milk has a clearly discernible sweetness too.
At the other extreme, rice milk contains only around 0.2 percent protein and is equally lacking in fat. Its foam is accordingly very lean and even more unstable than its soybean equivalent. The same applies to pure coconut milk too.
Almond milk is one of my personal favorites, less because of the foam and more because of the flavor. Here, however, opinions differ. Its fat content is quite good at around 3 percent, its protein content useful at around 1 percent.
Milk Foaming Techniques: What Works and What Doesn’t
Now that we know what we’re foaming, it’s time to find out how to froth milk. The options for hot milk usually include:
The automatic milk frothing systems on super-automatic machines
Espresso machine steam wands
Electric milk frothers
Manual milk frothers
DIY methods
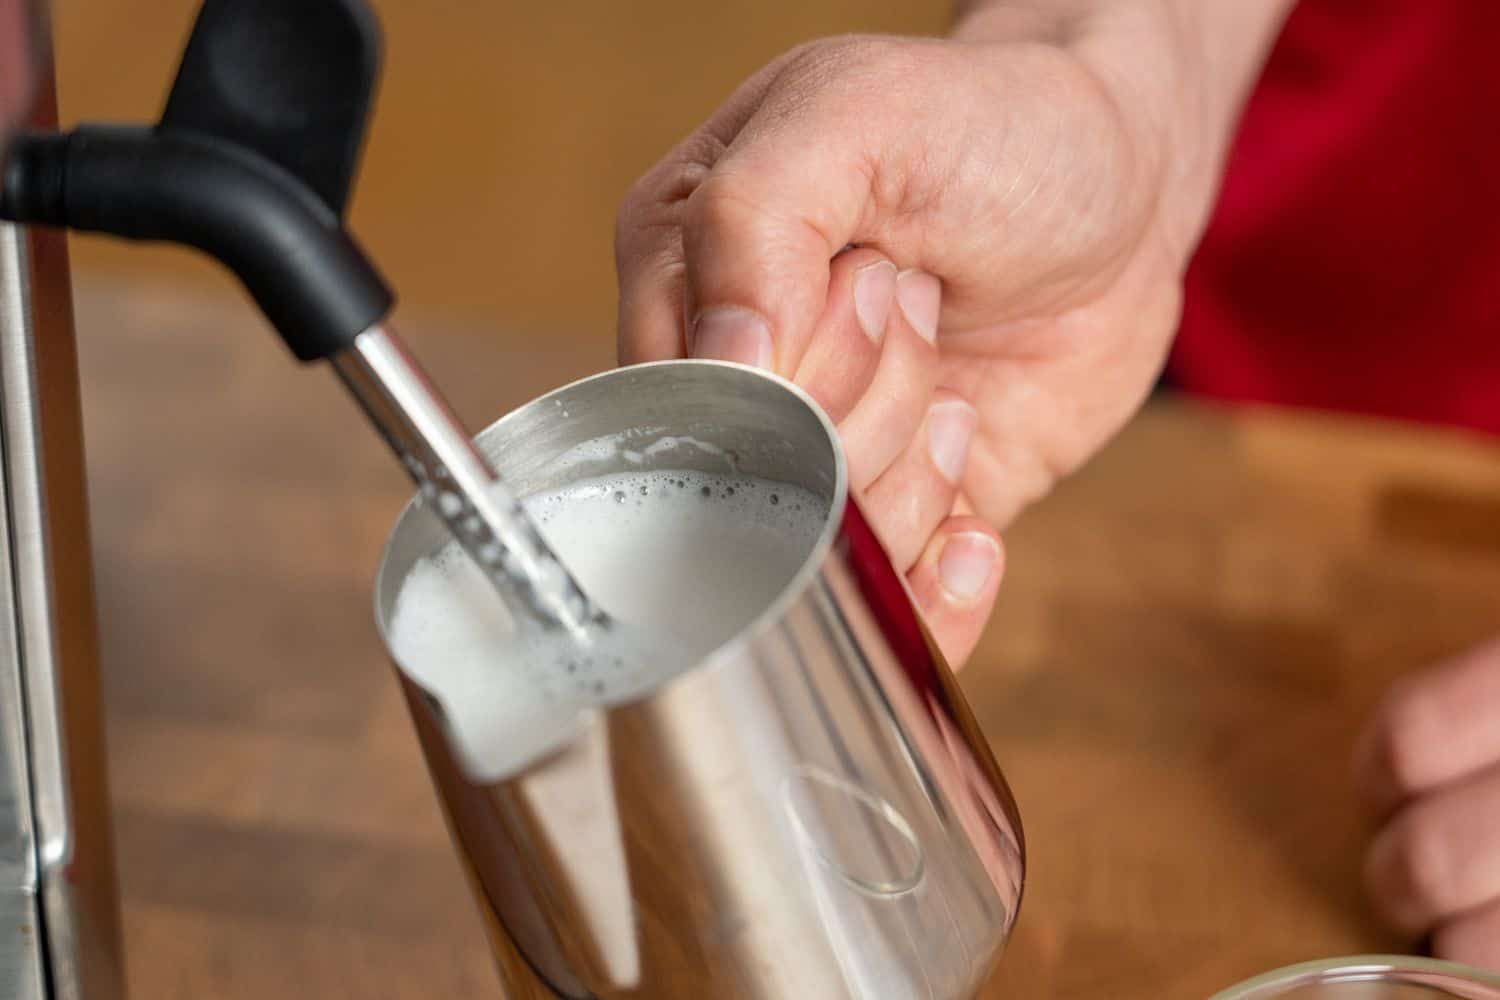
The first of my favorite methods for foaming milk is kind of obvious: I love working with steam wands because I’m in full control of what’s happening and I like pouring latte art. However, the most effective examples only come attached to more expensive espresso machines.
My second favorite method caught my attention during my reviews: I’ve become a real fan of automatic milk frothers! If you choose the right model, you can produce milk foam with absolutely no effort and surprisingly great results.
With super-automatic espresso machine milk systems, you usually have to compromise on consistency or temperature and many milk systems present a hygiene challenge. Still, it’s hard to beat their convenience.
If you’re interested in DIY methods, check out my article on steaming milk at home. I’ve included tons of hacks for producing unexpectedly good milk froth.
At this point, I want to let you in on some tips, tricks and features of a few milk frothing methods. You can find details in the review reports or in the respective main articles for each device category.
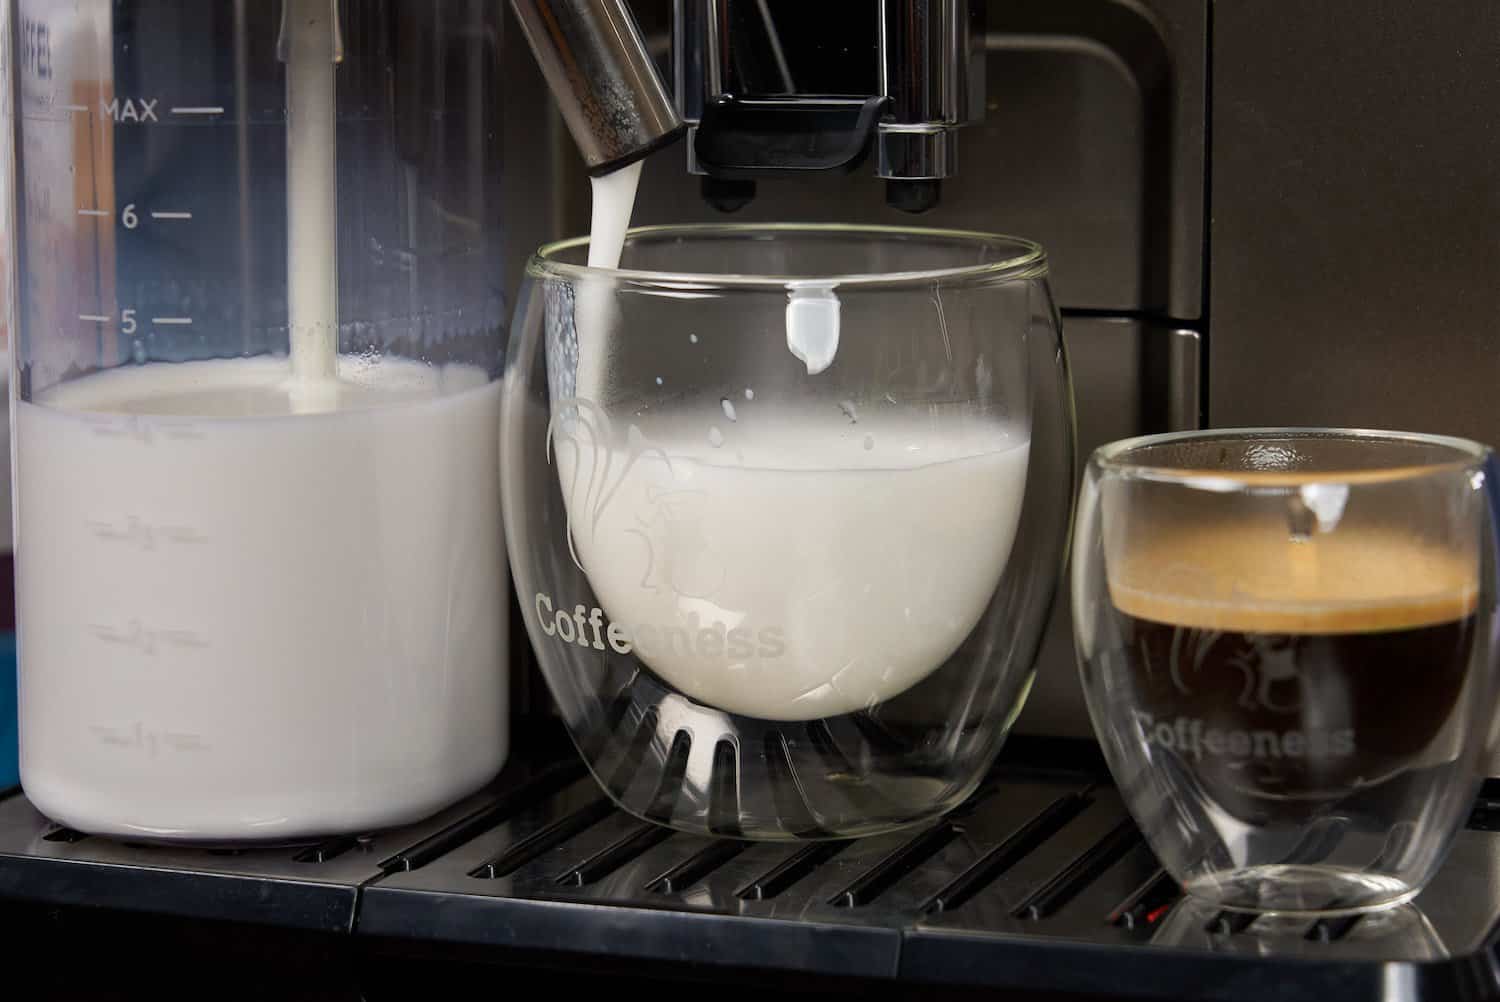
Frothing Milk With Super-Automatic Machines: Push a Button and Voilà!
As I’ve said before, nothing’s easier than pressing a button and letting the coffee machine do all the work. With super-automatic machines, milk is drawn up via an internal or external tube, heated and then driven with steam through nozzles that force the air molecules into the liquid.
It functions fully automatically, but in many cases still pretty clumsily. Super-automatic machine foam is often very firm and has a bubble bath-like quality. This is no manufacturing defect, but rather is specifically made that way. That’s because many consumers still want this “inferior” frothy milk and the manufacturers duly supply it. Old habits die hard, I guess.
Things are slowly changing though, as can be seen with the DeLonghi Dinamica or the Jura E8. Heck, the DeLonghi Eletta Explore even has a cold foam as well as a warm milk function!
When learning how to froth milk with a super-automatic machine, these important rules apply:
Always use the freshest cold milk possible
Clean the milk frothing system daily.
Flush it through once after each cycle (whether automatically or indirectly).
Use only well-filtered non-dairy milk, otherwise the nozzles and tubing will become blocked.
Check whether you can regulate the milk temperature and keep it below 158 degrees Fahrenheit (70 degrees Celsius).
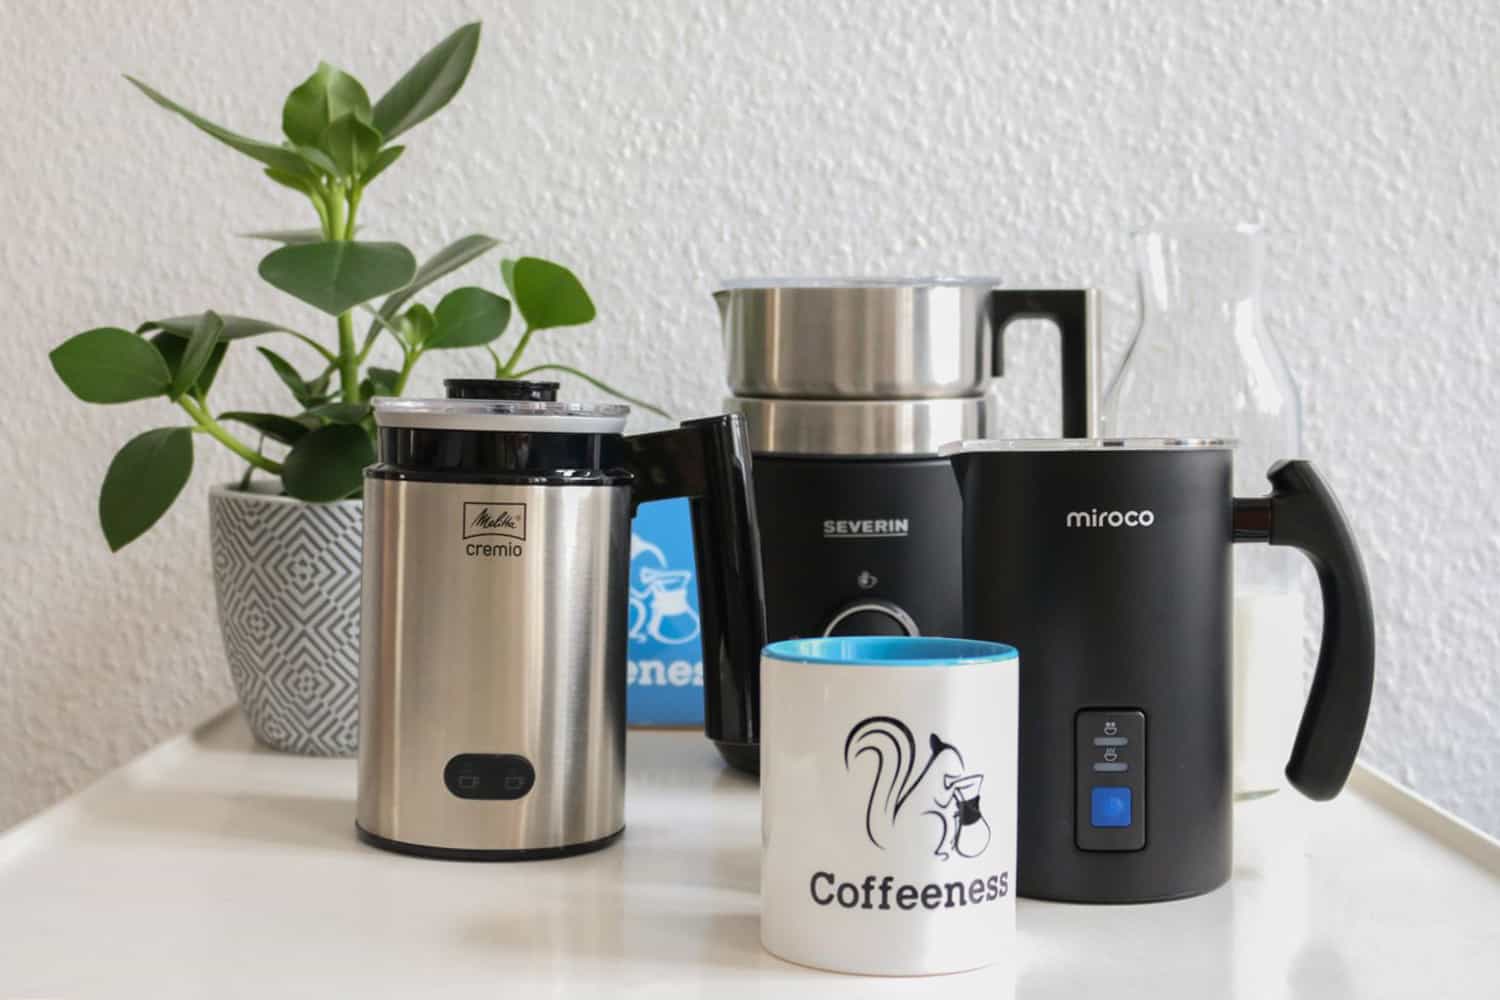
Milk Frothers: Simply Brilliant Under Ideal Conditions
Prior to writing my best milk frother guide, I was of the opinion that these specialized devices were only a temporary solution if you didn’t have a super-automatic machine..
I’ve since changed my mind. That’s because the frothers I’ve reviewed really do achieve excellent results. Plus, they’re much easier to clean than some super-automatic machines and take up very little space.
You have the choice of three basic device types:
Automatic milk frothers with induction heating
Electric milk frothers with batteries (aka “magic wands”)
Manual milk frothers
All three have their advantages and disadvantages:
| TYPE | ADVANTAGES | DISADVANTAGES |
|---|---|---|
| Automatic milk frothers | · Excellent results in some cases · Quiet and hygienic · Everything happens automatically · Multiple functions | · Quite expensive and/or bulky, depending on the model · Not much ability to influence foam results |
| Electric milk frothers | · Very easy to use and super affordable · Suitable for many kitchen tasks when used as an “electric whisk” | · Milk must be heated separately · Mostly disappointing results · Quickly become broken |
| Manual milk frothers | · Excellent results in some cases · Quiet and hygienic · Very affordable · Ability to individually adjust foam results | · Milk must be heated separately · Requires elbow grease |
From the table you’ll see that I prefer the manual as well as the automatic milk frothers, whilst the “magic wands” were tested more for the sake of completeness.
The review selection continues to grow, but I do have some clear recommendations for you:
Maestri House Milk Frother delivers great foam, but is comparatively expensive
Bodum Latteo Manual Milk Frother is my absolute favorite of all the manual models
Manual Steam Wands: Professional Results That Are Worth the Effort
I’ll never understand why super-automatic espresso machine manufacturers regard steam wands as “cheap features.” I can understand, however, that the level of effort and learning involved is out of all proportion to what super-automatic machines fundamentally promise: everything at just the push of a button!
More and more steam wands should be able to function simply by putting a milk pitcher underneath. That’s certainly the case with some Breville espresso machines. In fact, the Breville Barista Touch Impress kinda dented my ego with its exceptional hands-free microfoam.
Steam wands fall into two categories: powerful and not quite so powerful. Inexpensive super-automatic machines such as the evergreen DeLonghi ECAM 22.110 have very short, quite movement-restrictive wands with relatively little steam pressure.
That’s only to be expected because expensive commercial espresso machines play in a completely different league.
That doesn’t mean you can’t produce good milk foam with super-automatic steam wands. You’ll just need a lot more practice and patience. Plus, you should always keep the water tank filled up, so you don’t have to interrupt foam preparation half-way through.
It’s worthwhile purchasing a particularly small and easy to handle stainless steel milk pitcher. That way, you can get more out of the radius of action and hit the right angle despite having limited space.
How to Froth Milk With a Steam Wand
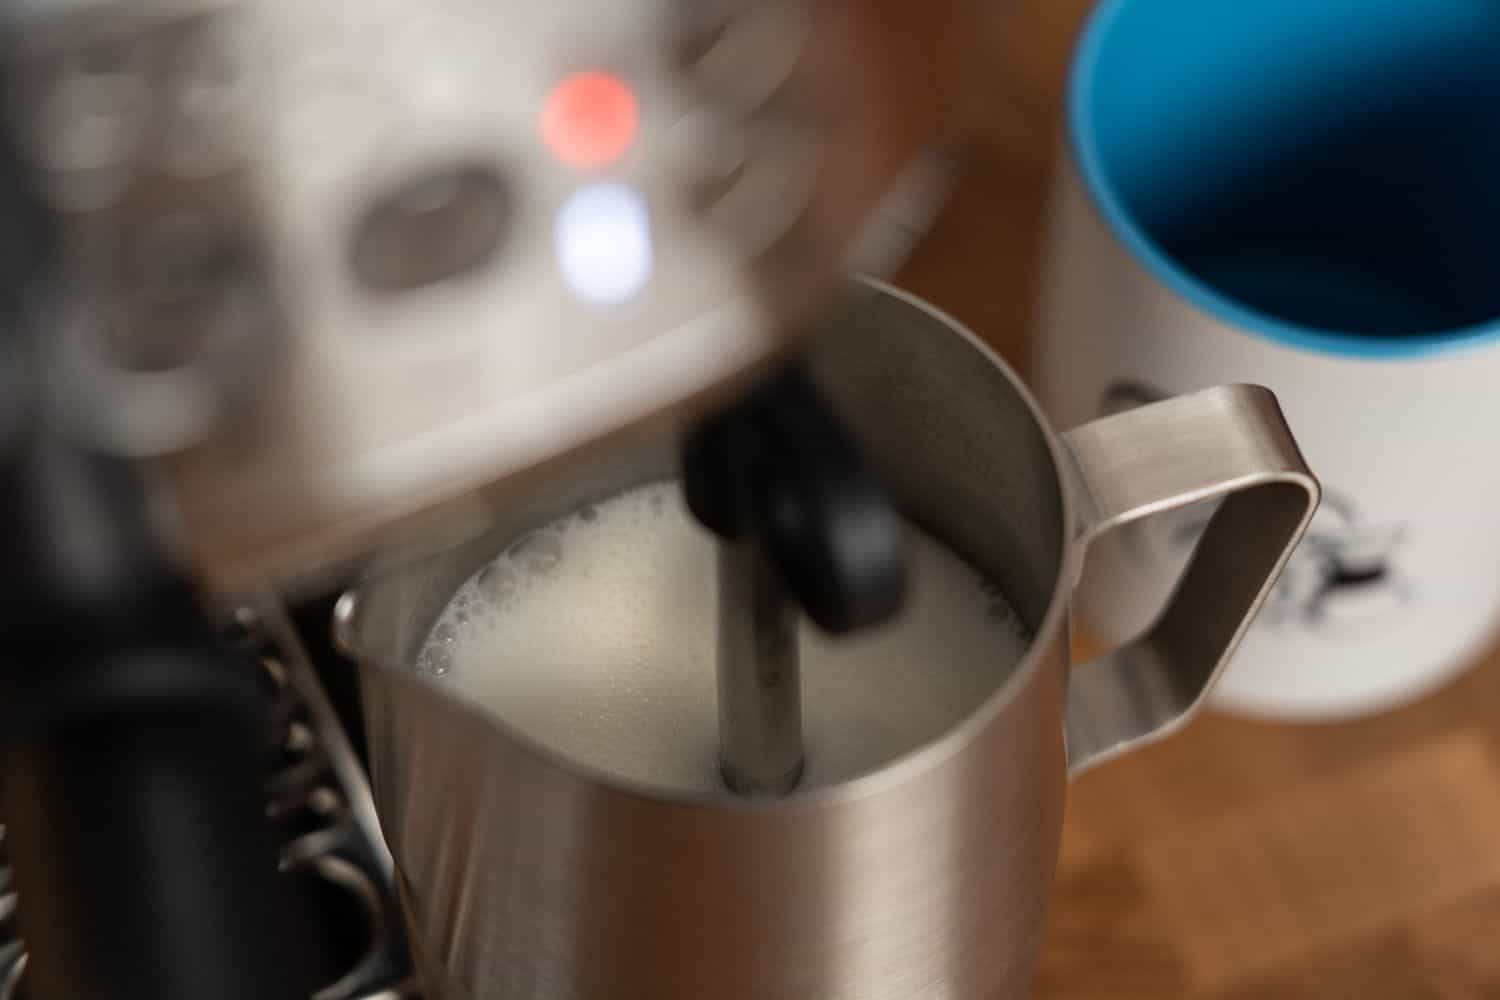
When learning how to froth milk with a steam wand, it’s all the more important that the milk comes from the refrigerator. That’s because you need some time to create microfoam without the milk burning.
Also essential are a clean pitcher and a thermometer, so as not miss the ideal time to turn off the machine. Professionals do the “hand test” and will at some point know that the foam is ready. Still, a thermometer will make your life easier.
Once you have the right equipment, the name of the game is practice. I can’t remove that step for you entirely, but can at least give you a few basic tips:
Always fill the pitcher to about one third full, because you’ll need space for the foam and don’t want to waste milk
The steam wand should initially almost completely disappear into the pitcher, ideally at an angle
As soon as it’s engaged, slowly pull the pitcher away from the steam wand in a controlled manner. If done correctly, you’ll achieve the right amount of foam before the thermometer has even reached 104 degrees Fahrenheit (40 degrees Celsius)
In that case, submerge the wand again to provide the correct/desired milk temperature
Above all, you can determine whether you’re doing a good job from the sound:
If its even and quiet, the foam will be even too. Spluttering and screeching indicate that you’ve pulled the outlet nozzle too far out or that the milk is already scalding.
A good trick to bring calm to the situation is to keep the steam wand briefly below the surface of the milk at the beginning and to then let the nozzle “tear” very slightly at the surface. It should then go back down to the bottom of the pitcher.
That’s it for my updated guide on how to froth milk. Any tips you’d like to share? Please keep the comments and suggestions coming!
How to Froth Milk FAQ
The best way to froth milk is to use the manual steam wand on a good espresso machine.
There are tons of ways to froth milk without a frother. One particularly good method is to put warmed milk in a French press then pump it vigorously.
It’s best to use cold milk when you’re learning how to froth milk.
You can use many different kinds of dairy and non-dairy milks to create good froth.